SCIM Import
SCIM User Import from Okta to InstaSafe Application
1. Overview
This guide explains how to configure SCIM User Import from Okta to your application. After configuration, users and groups from Okta are automatically imported into your application.
SCIM (System for Cross-domain Identity Management) is an industry-standard protocol used for automated user provisioning and lifecycle management between an Identity Provider (Okta) and your application (Service Provider). Once configured, Okta becomes the authoritative source for user and group data in your application.
2. Benefits
- Automatic user and group import
- Centralized identity management through Okta
- Reduced manual user creation in your application
- Automatic user updates and deprovisioning
- Improved security and audit visibility
SCIM User Import ensures that user information in your application remains synchronized with Okta.
3. When Should You Enable SCIM User Import?
Enable SCIM User Import if:
- You manage users primarily in Okta
- You want automatic user provisioning in your application
- You want to eliminate manual user management
- You require centralized lifecycle management (joiner, mover, leaver process)
- You need consistent user data across systems
SCIM Import is recommended for organizations using Okta as their primary Identity Provider.
4. Prerequisites
Before configuring SCIM User Import from Okta to your application, ensure that you have:
- Administrator access to the Okta Admin Console
- Administrator access to your application
- SCIM Base URL of your application
- SCIM Authentication Token (if required)
- Required user and group attribute mappings
- Network connectivity between Okta and your application
Once these prerequisites are met, you can proceed with the SCIM configuration for seamless user synchronization.
5. Generate SCIM API Token in InstaSafe
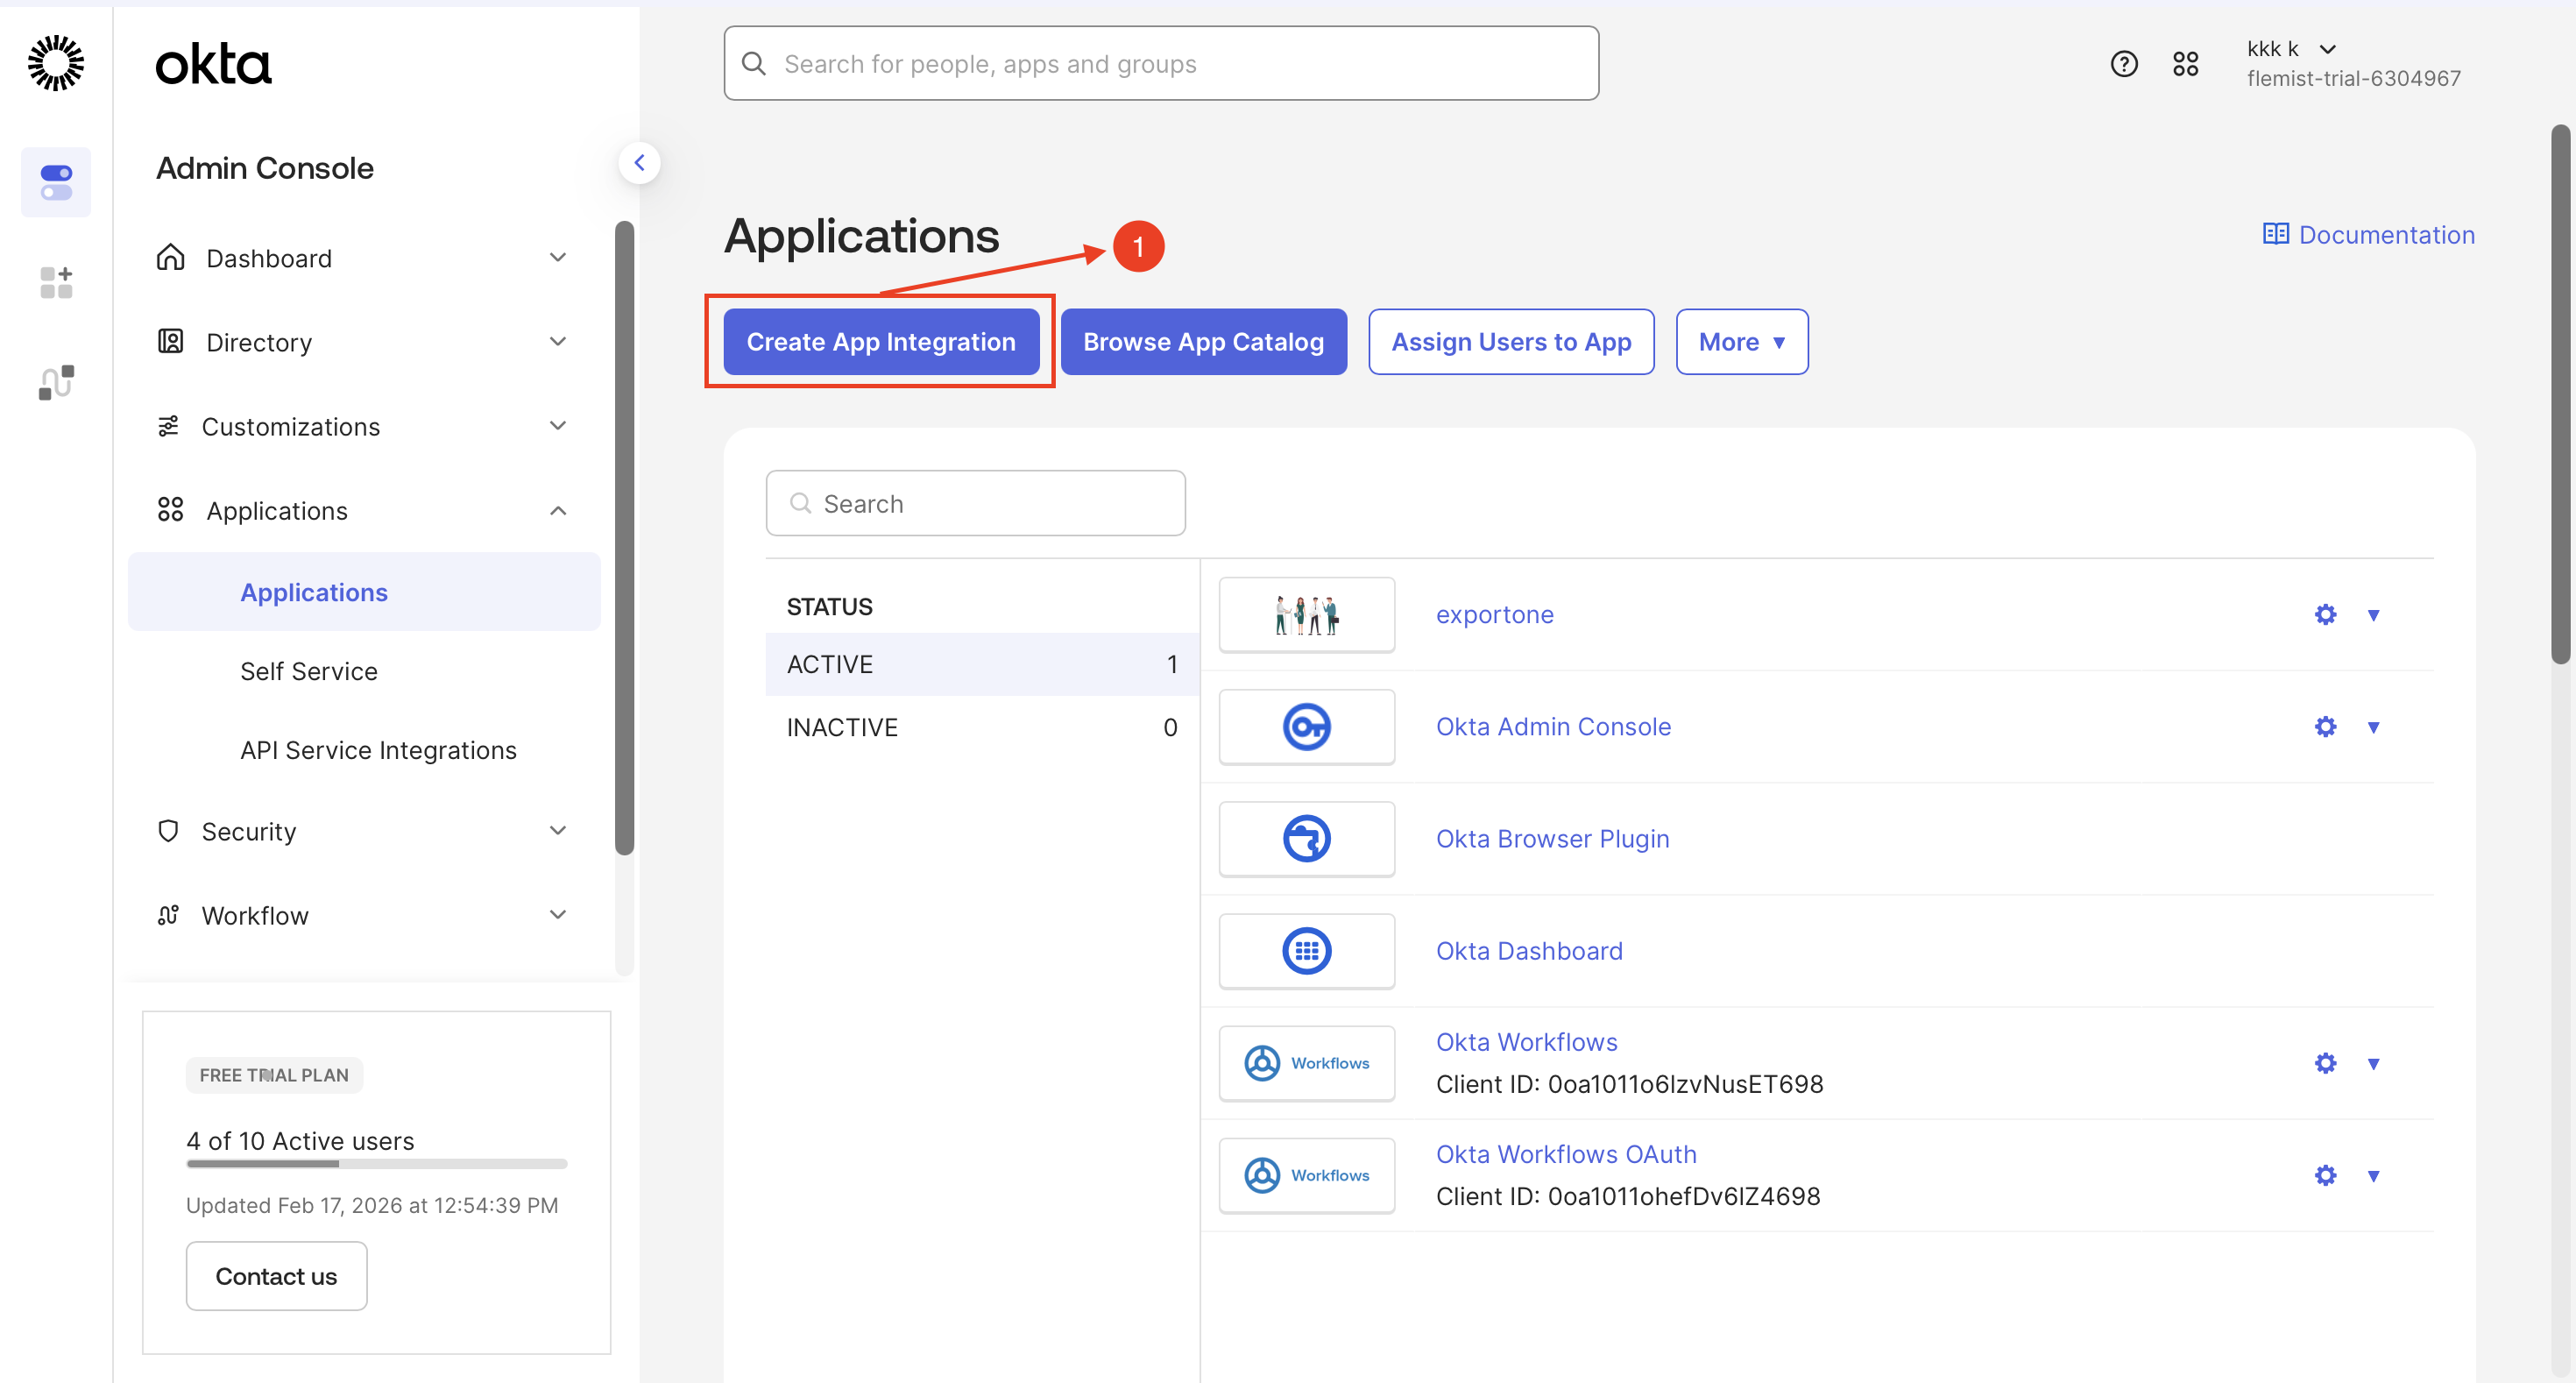
Step 1: Add New Application
- Log in to the Admin Console
- Navigate to: Applications → Applications
-
Click Create App Integration
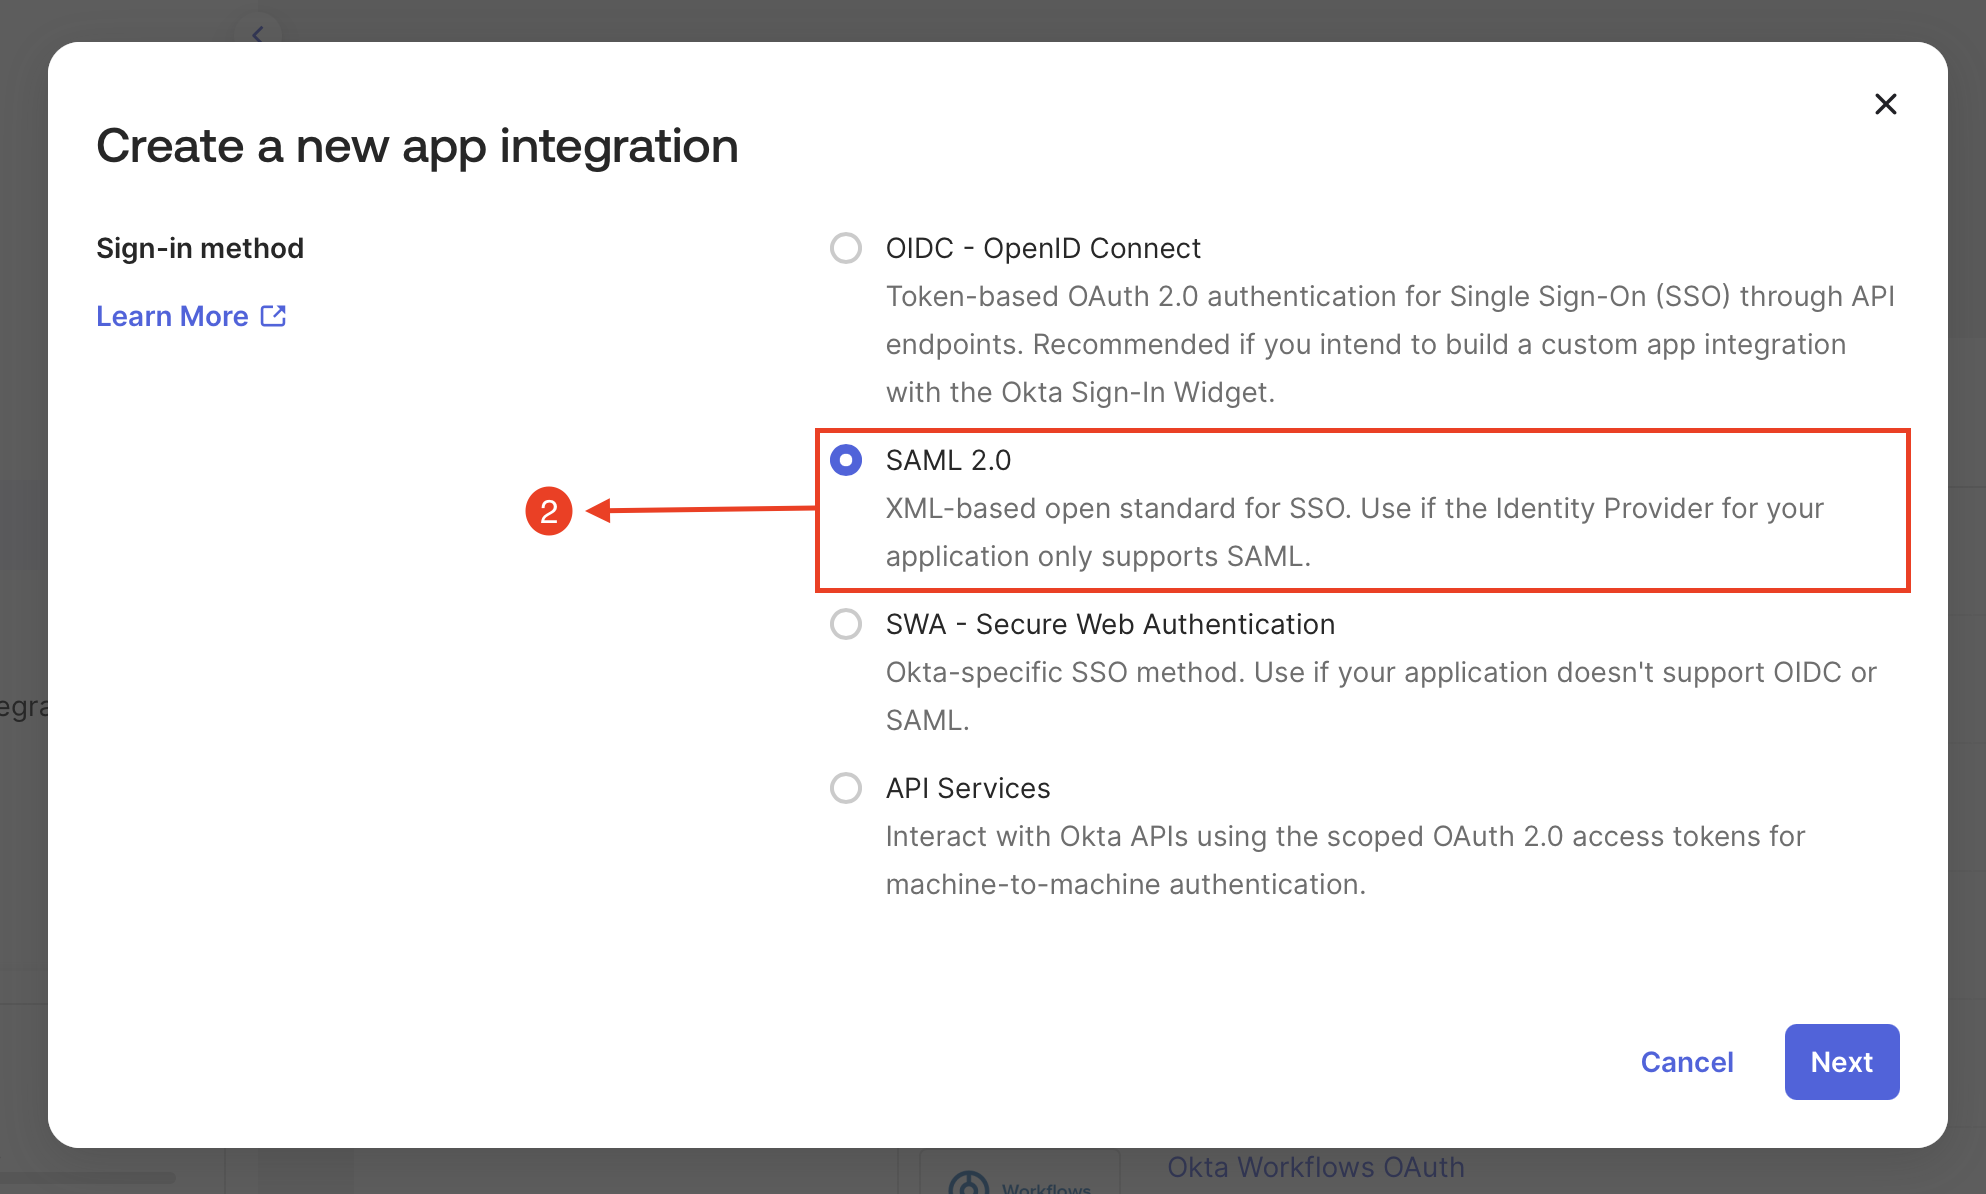
Step 2: Selecting the Authentication Type
- Select the authentication type as SAML 2.0
-
Click Next
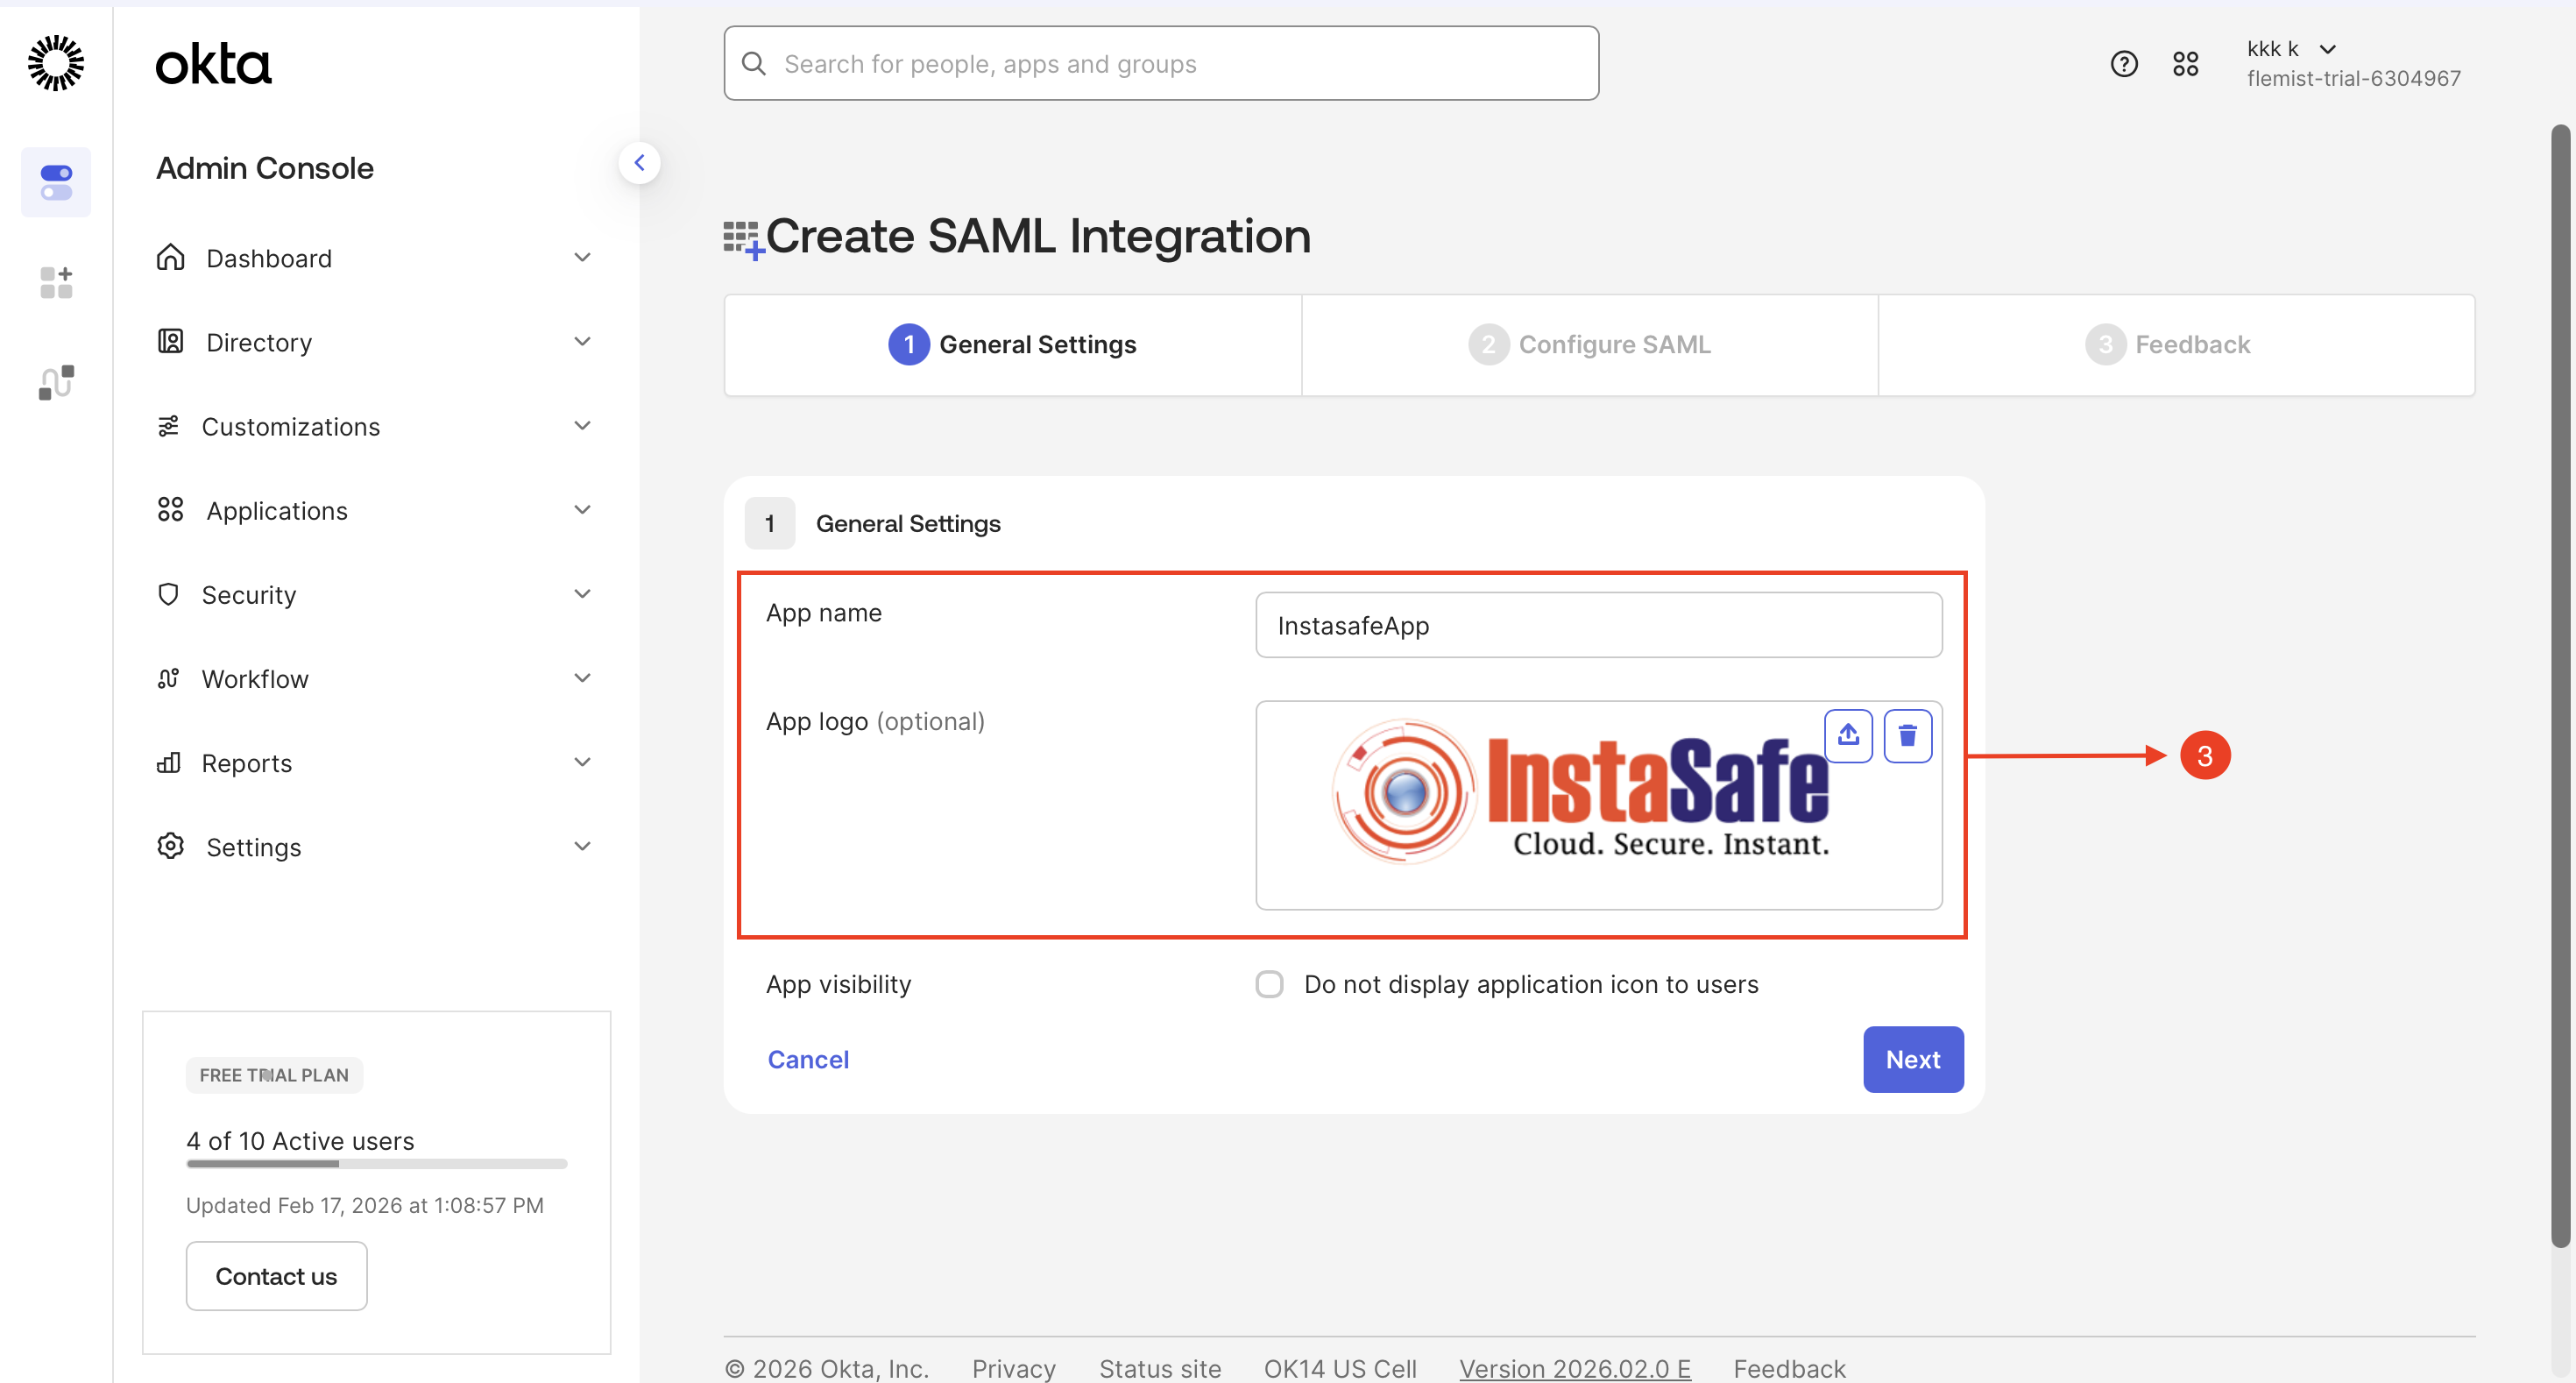
Step 3: Create SAML Integration - General Settings
- Type Name of the Application, Enter a unique name (e.g., InstasafeApp)
- Upload a logo for easy visual identification of the application in the console
-
Click Next
Step 4: Configure SAML Authentication
- Access the InstaSafe Admin Console and navigate to the Authentication Profile section
- Select SAML as the authentication protocol to enable single sign-on (SSO) for the application
- Download the Service Provider (SP) Metadata file, which is required for IdP integration
The SP Metadata file contains all critical SAML configuration parameters, including:
- Assertion Consumer Service (ACS) URL
- Entity ID
-
Certificate information
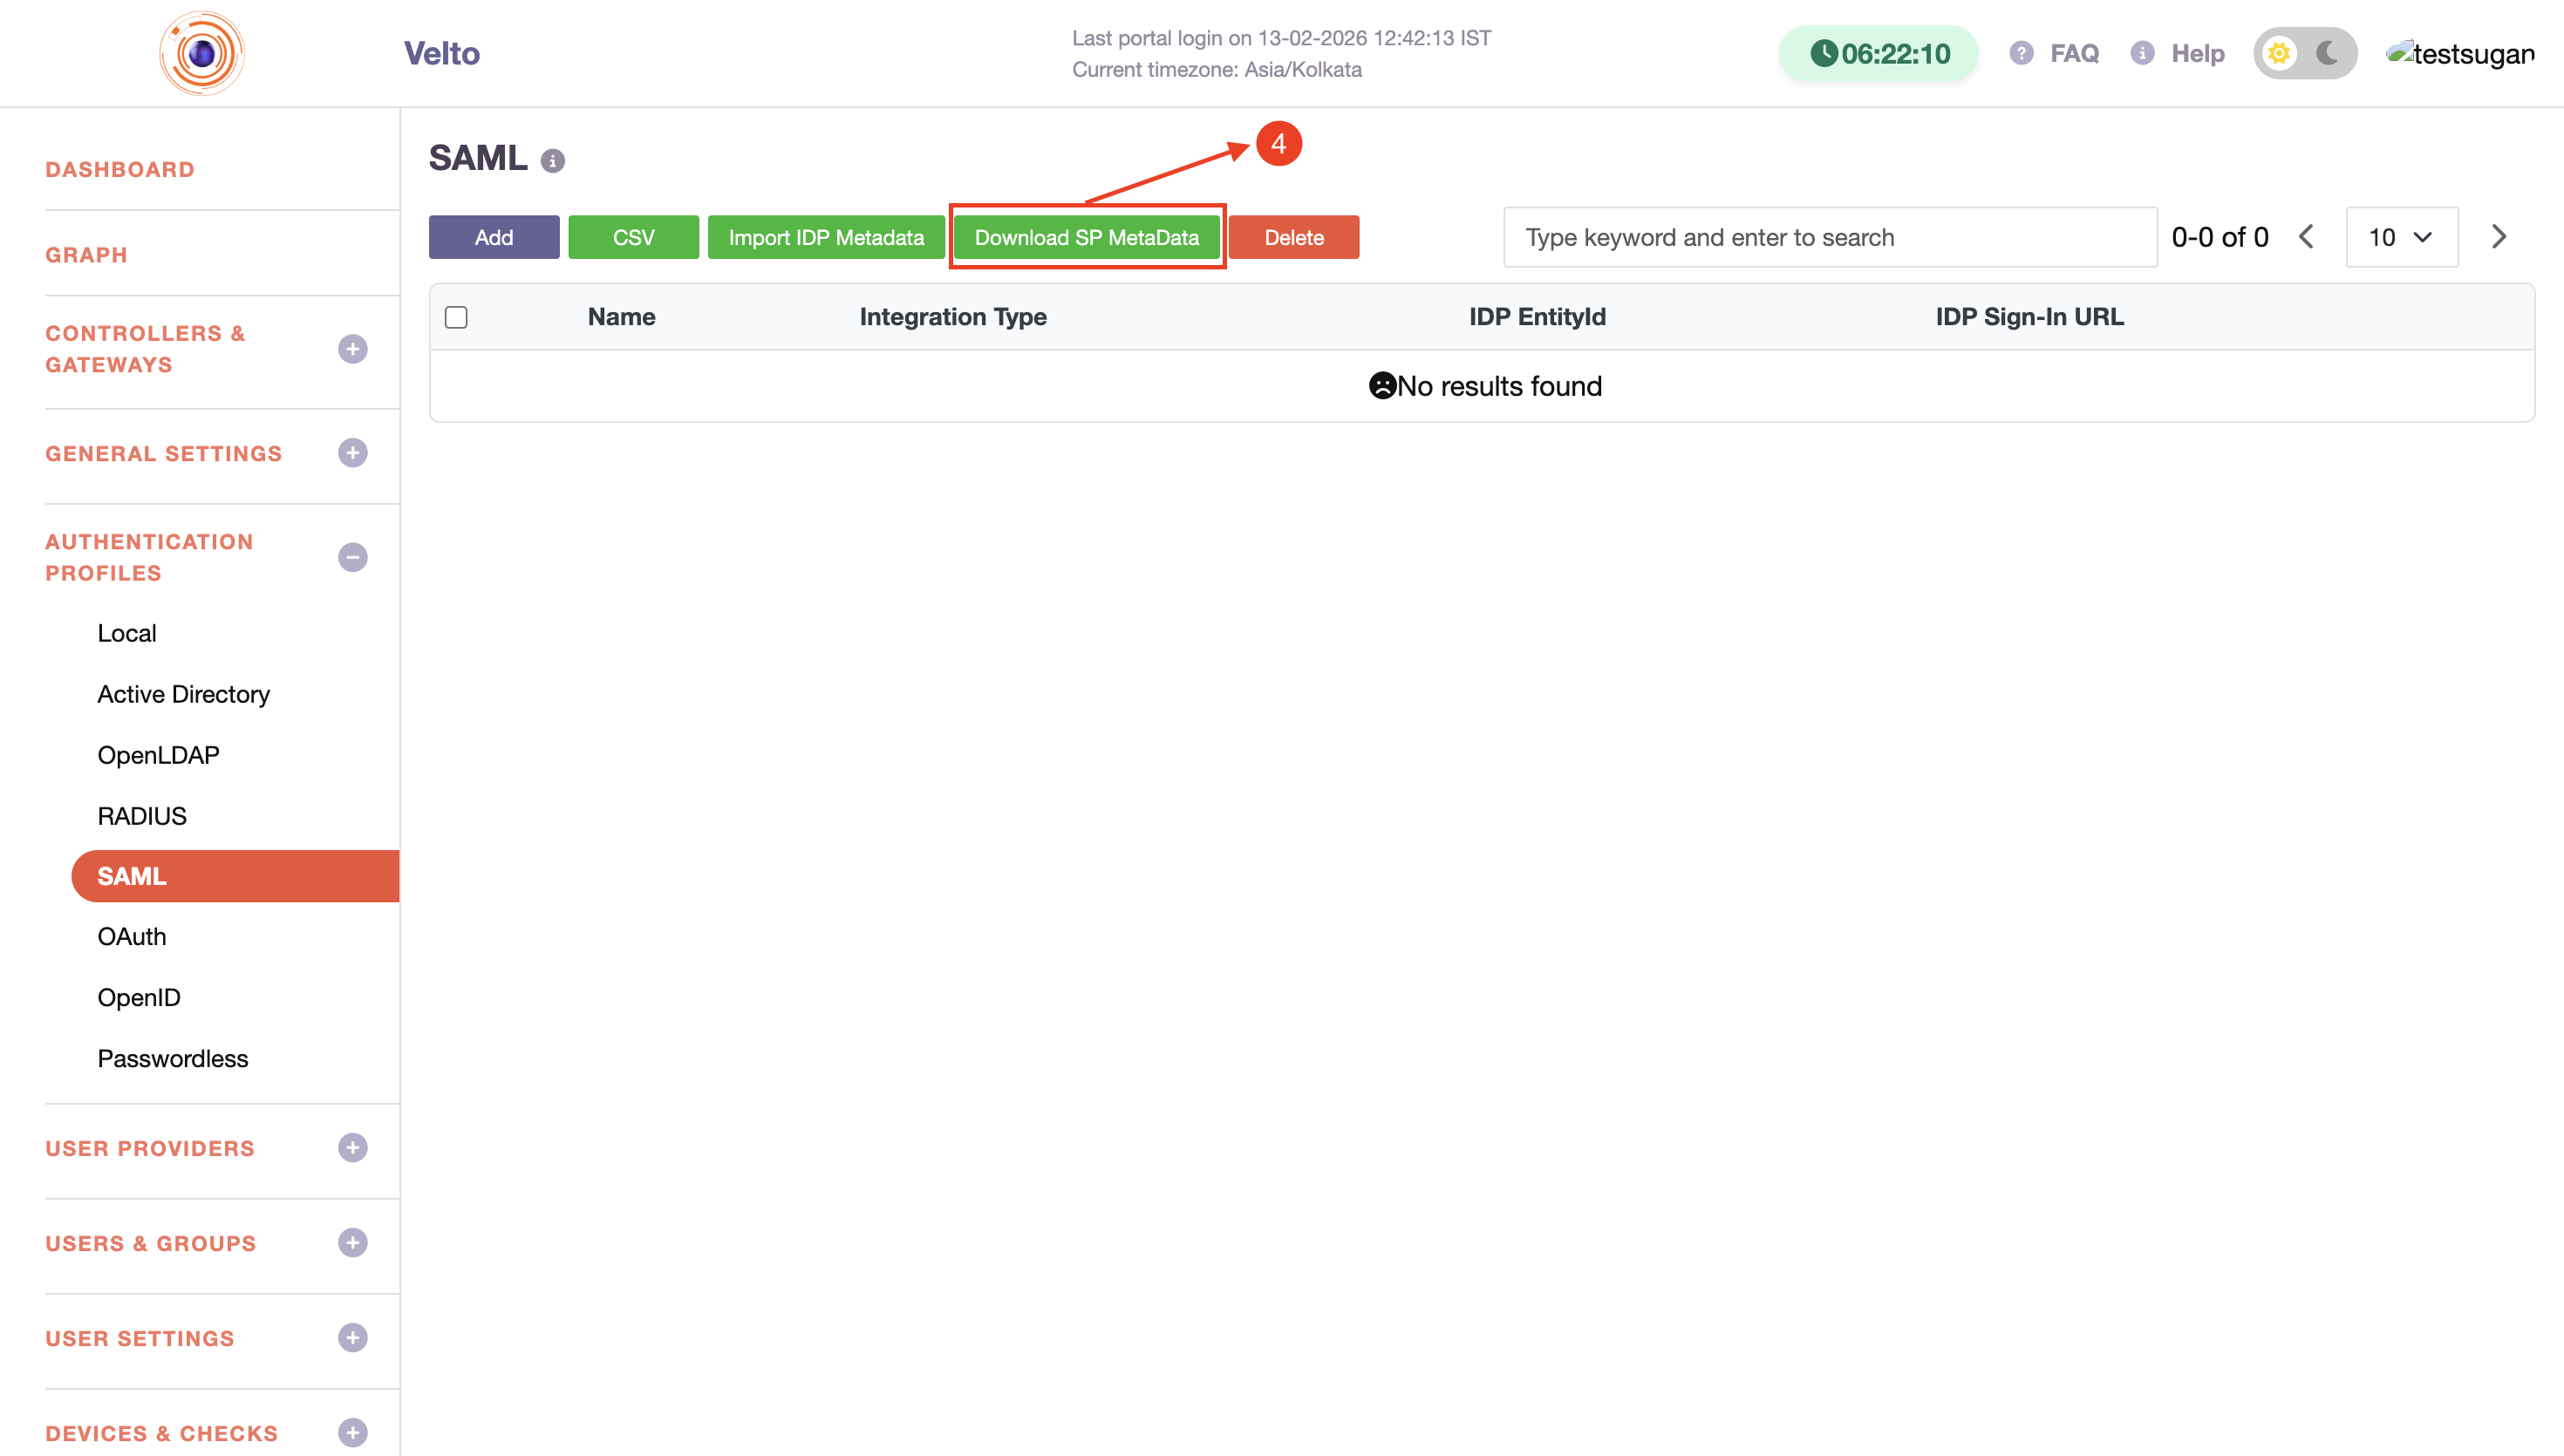
These are necessary for establishing a secure SSO connection.
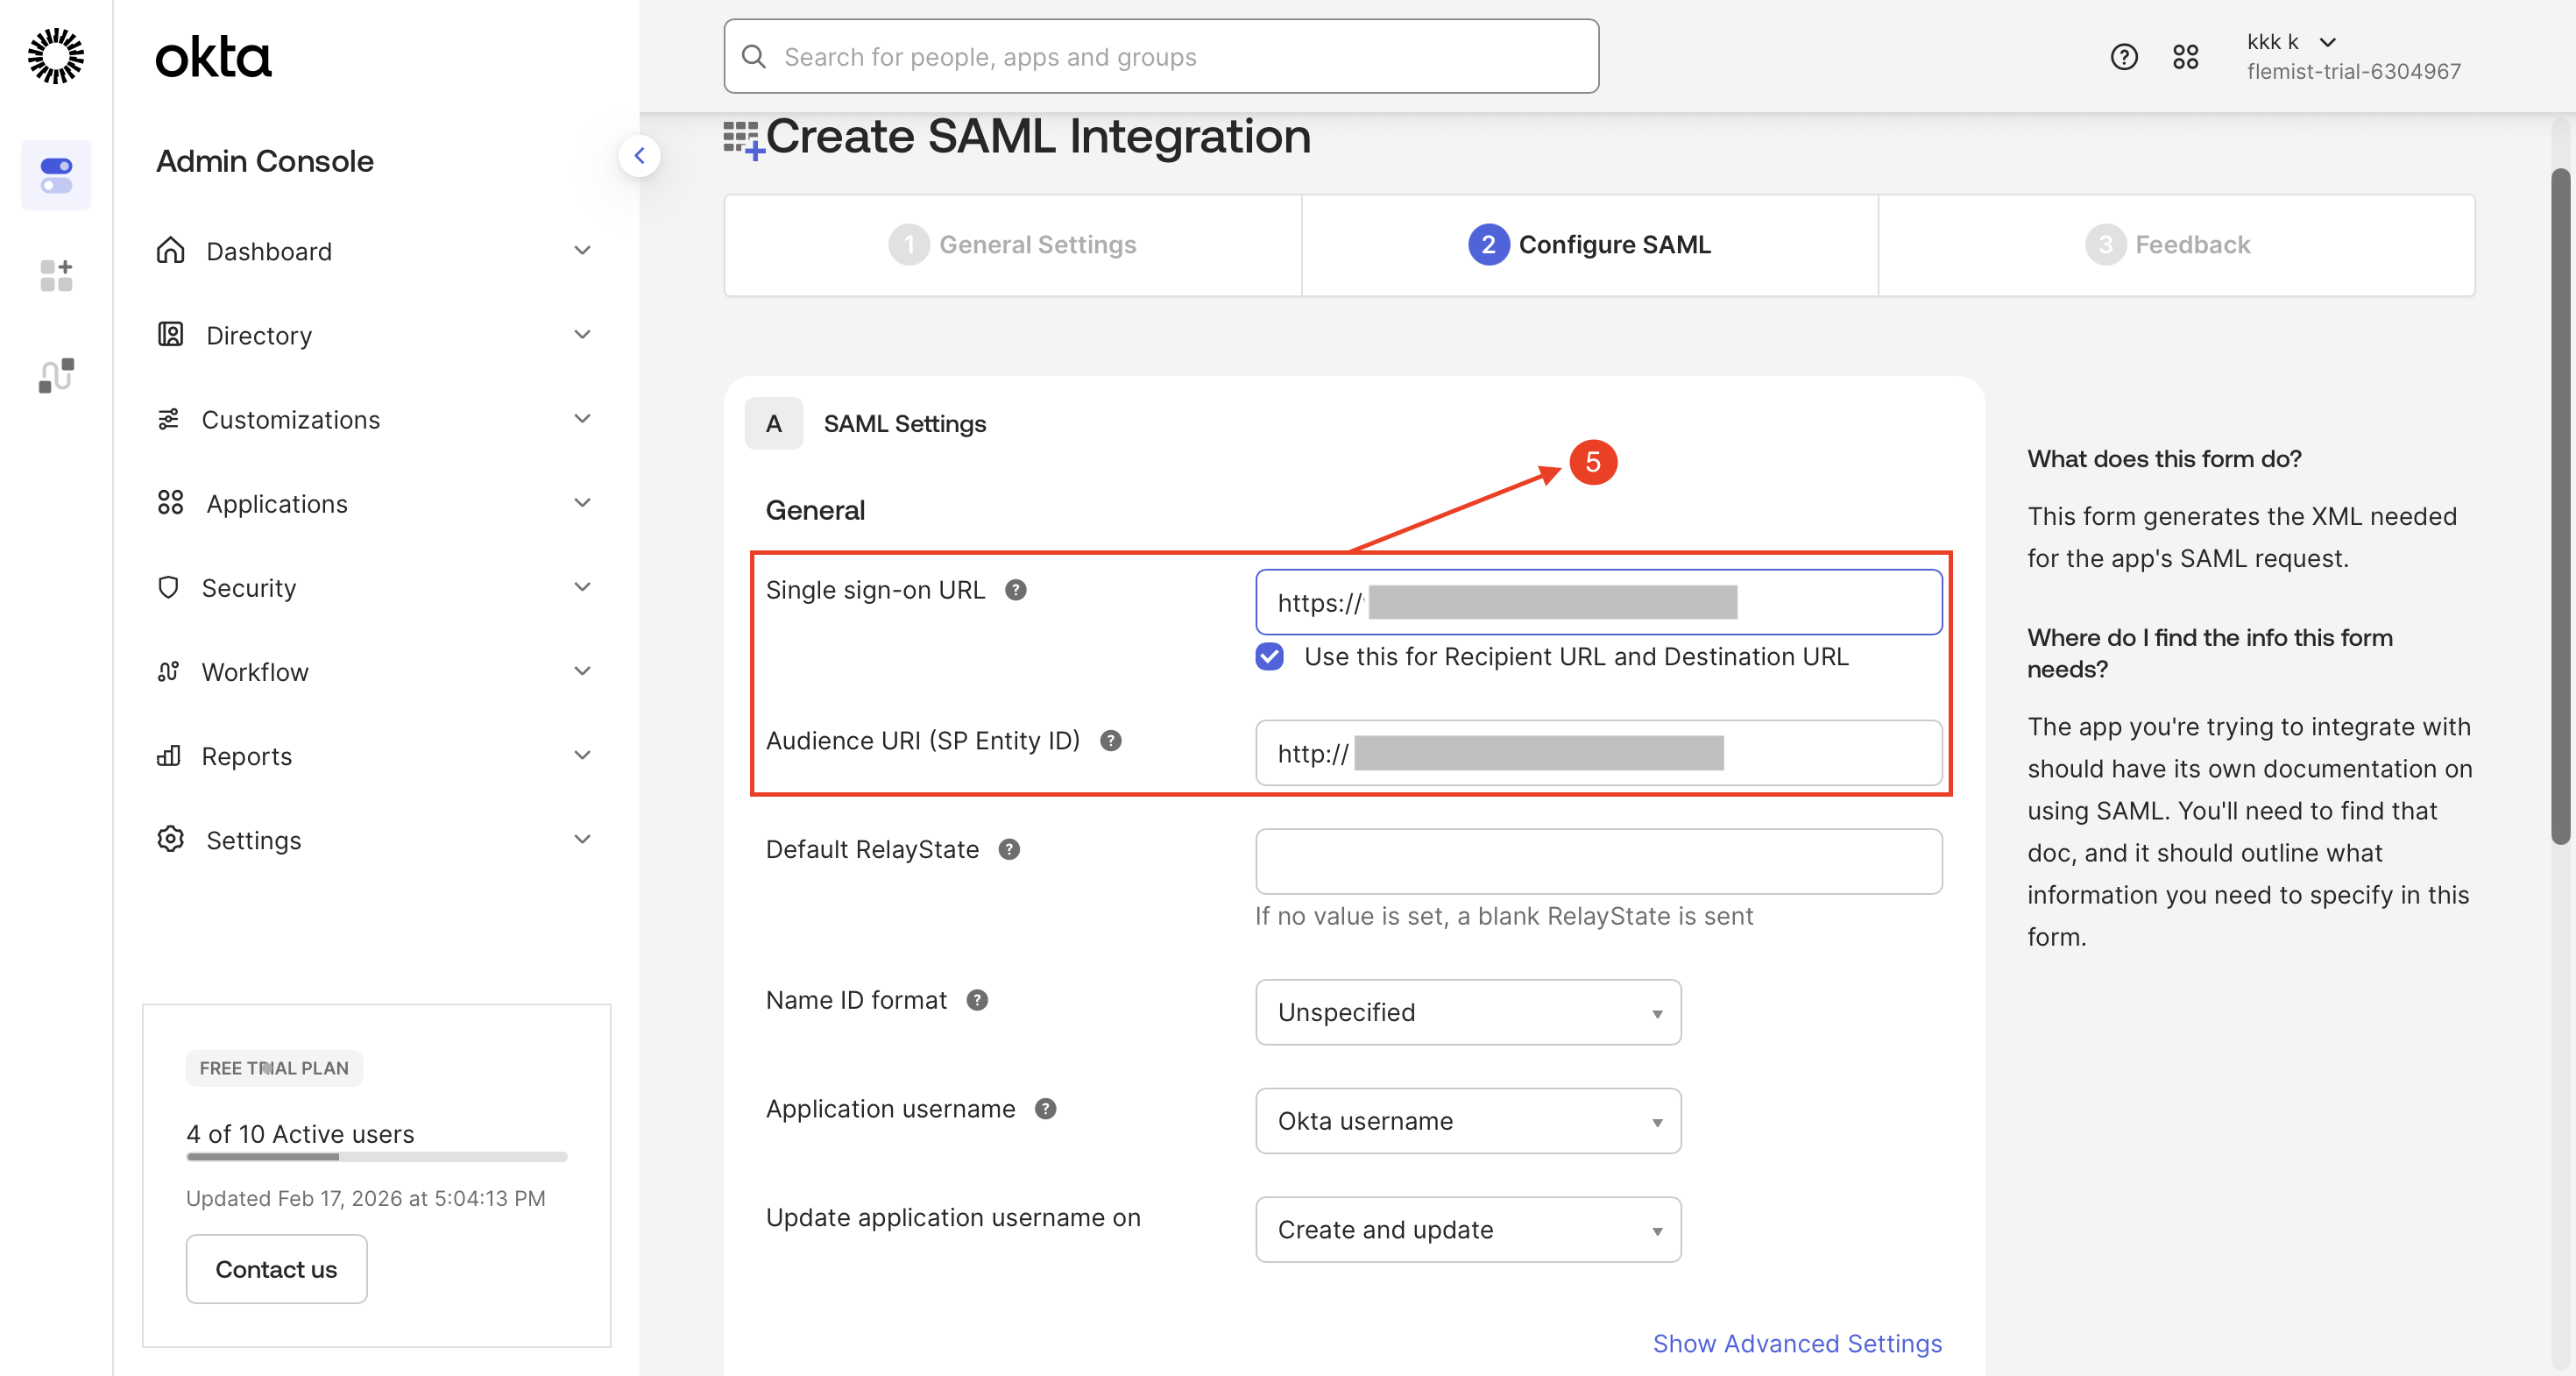
Step 5: Create SAML Integration - Configure SAML
- Enter the Single Sign-On (SSO) URL obtained from the downloaded metadata file
- Enter the Service Provider (SP) Entity ID as specified in the metadata file
- Click Next
-
Skip the feedback section and click Finish to complete the configuration process
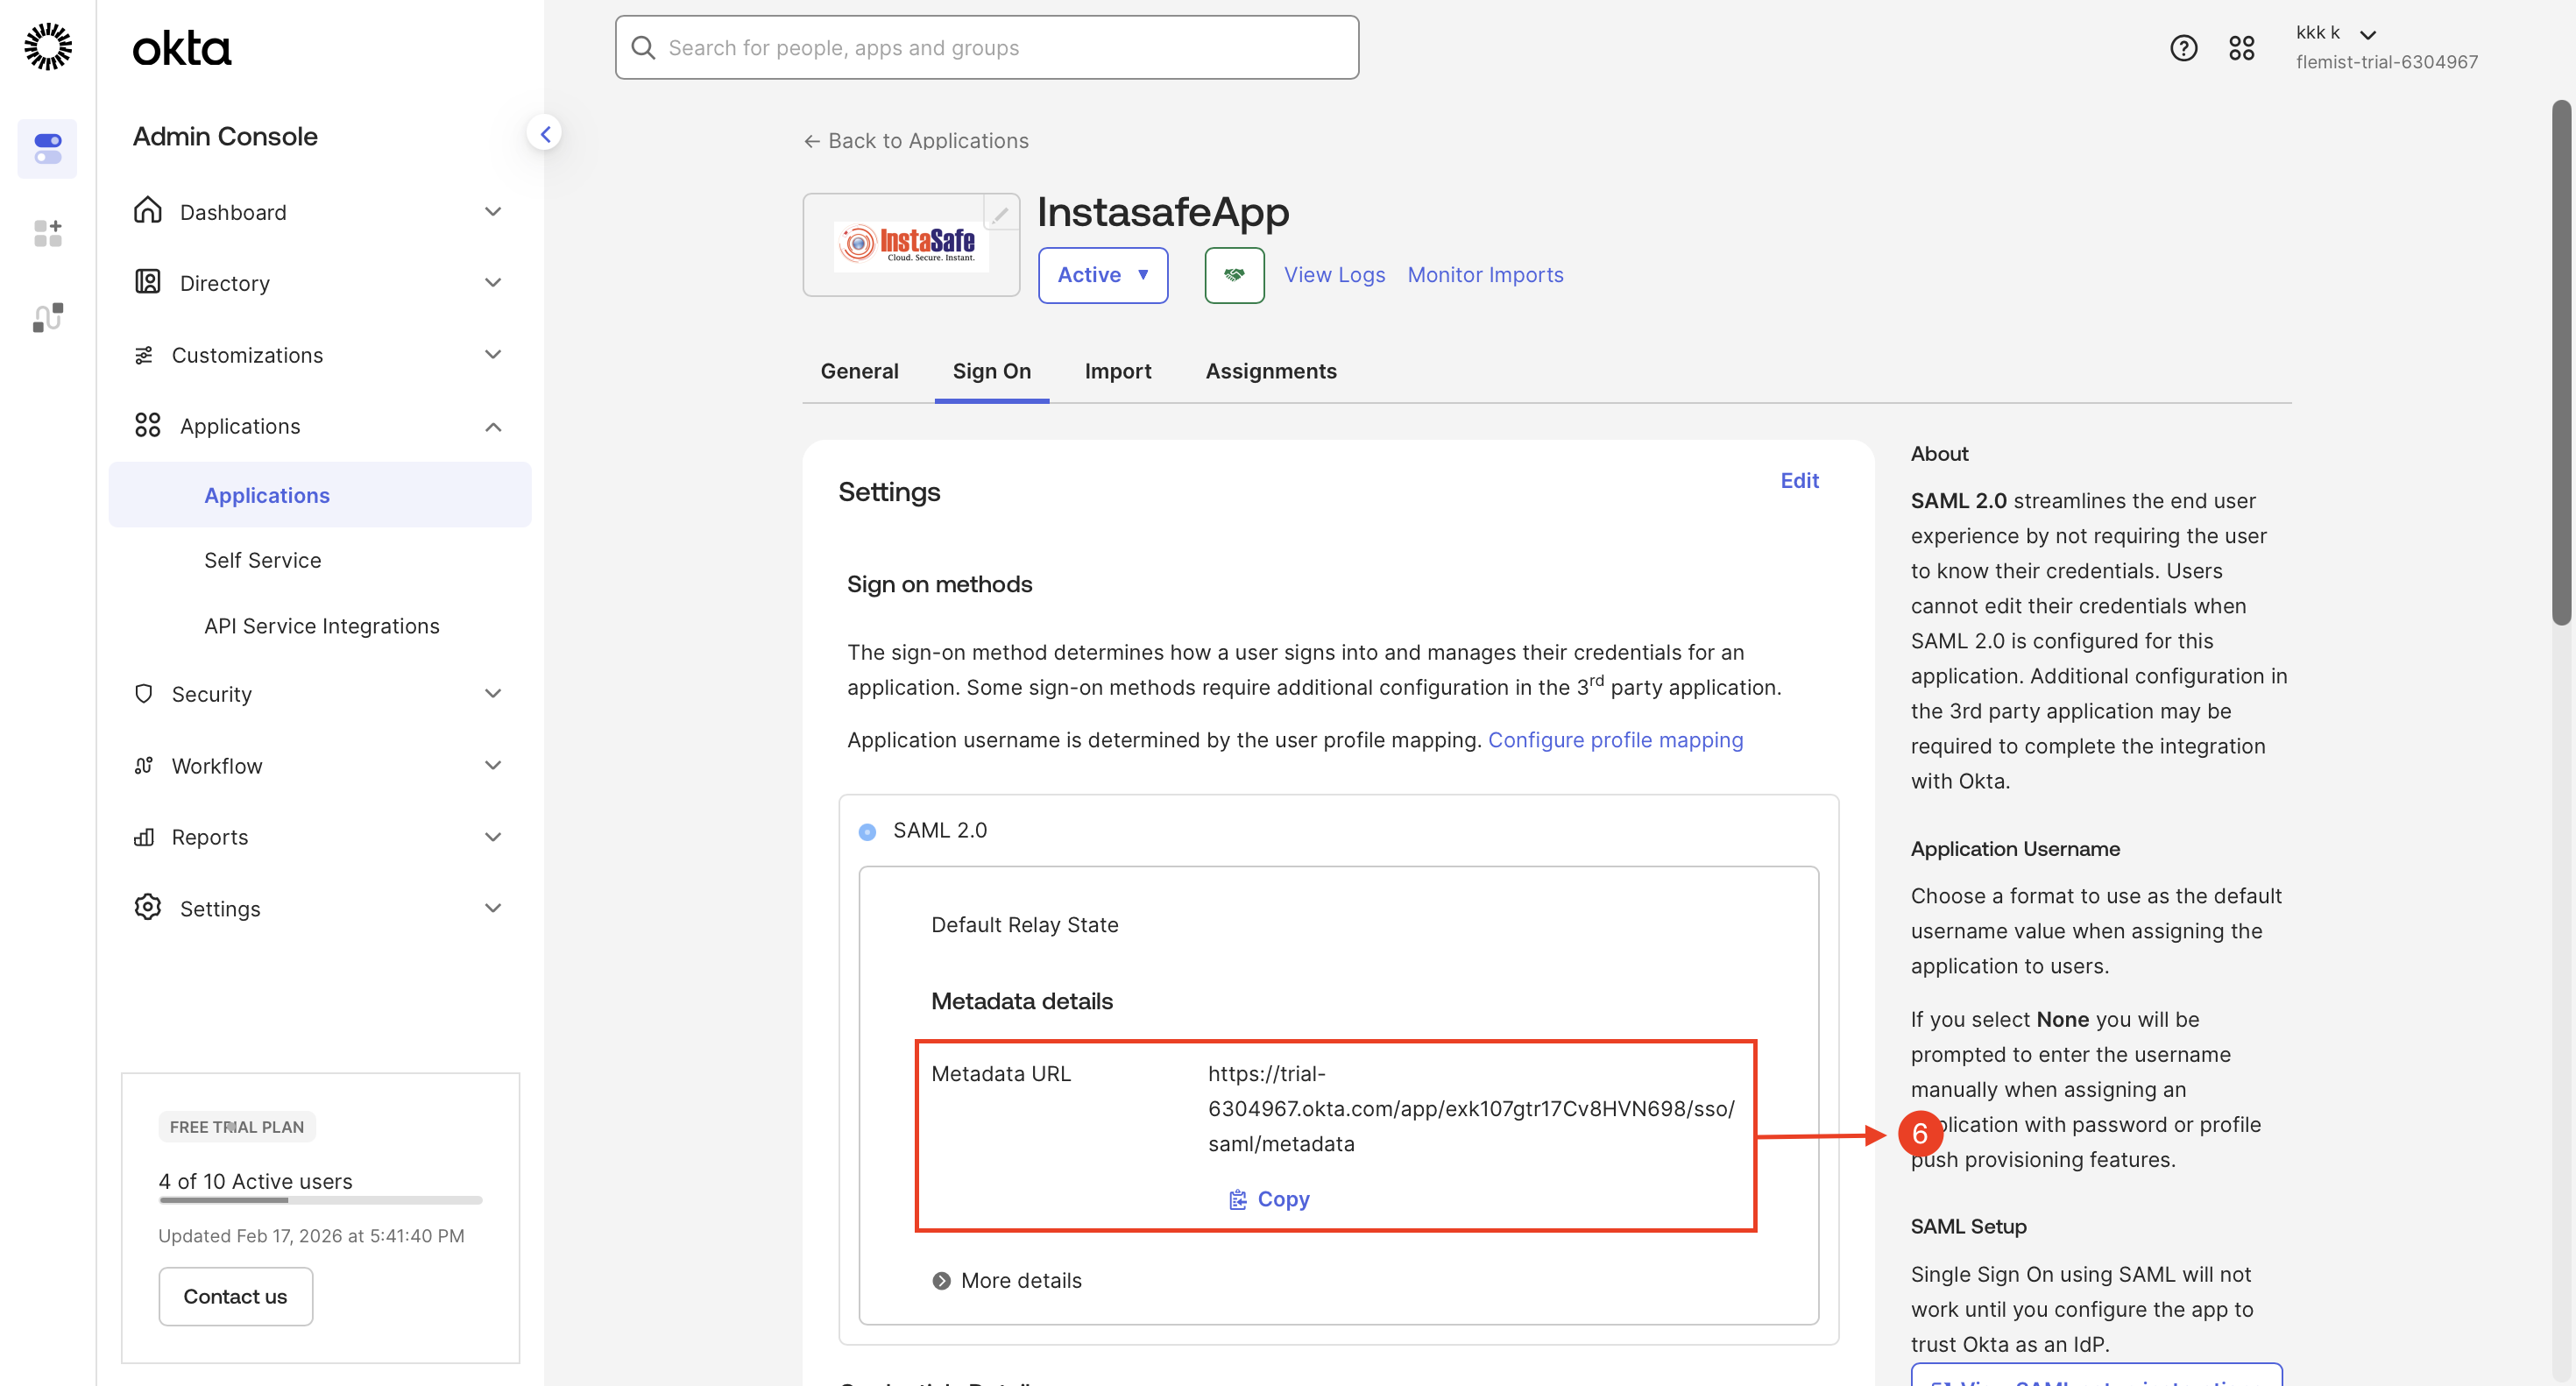
Step 6: Copy the Metadata details
- Copy the Metadata URL and paste it into a web browser
-
The metadata file will be downloaded automatically
Step 7: Copy the Metadata details
- Access the InstaSafe Admin Console and navigate to the Authentication Profile section
- Click SAML as the authentication protocol
- Click Import IDP Metadata
- Upload the metadata file, then click Save to apply the configuration
The SP Metadata file contains all critical SAML configuration parameters, including:
- Assertion Consumer Service (ACS) URL
- Entity ID
-
Certificate information
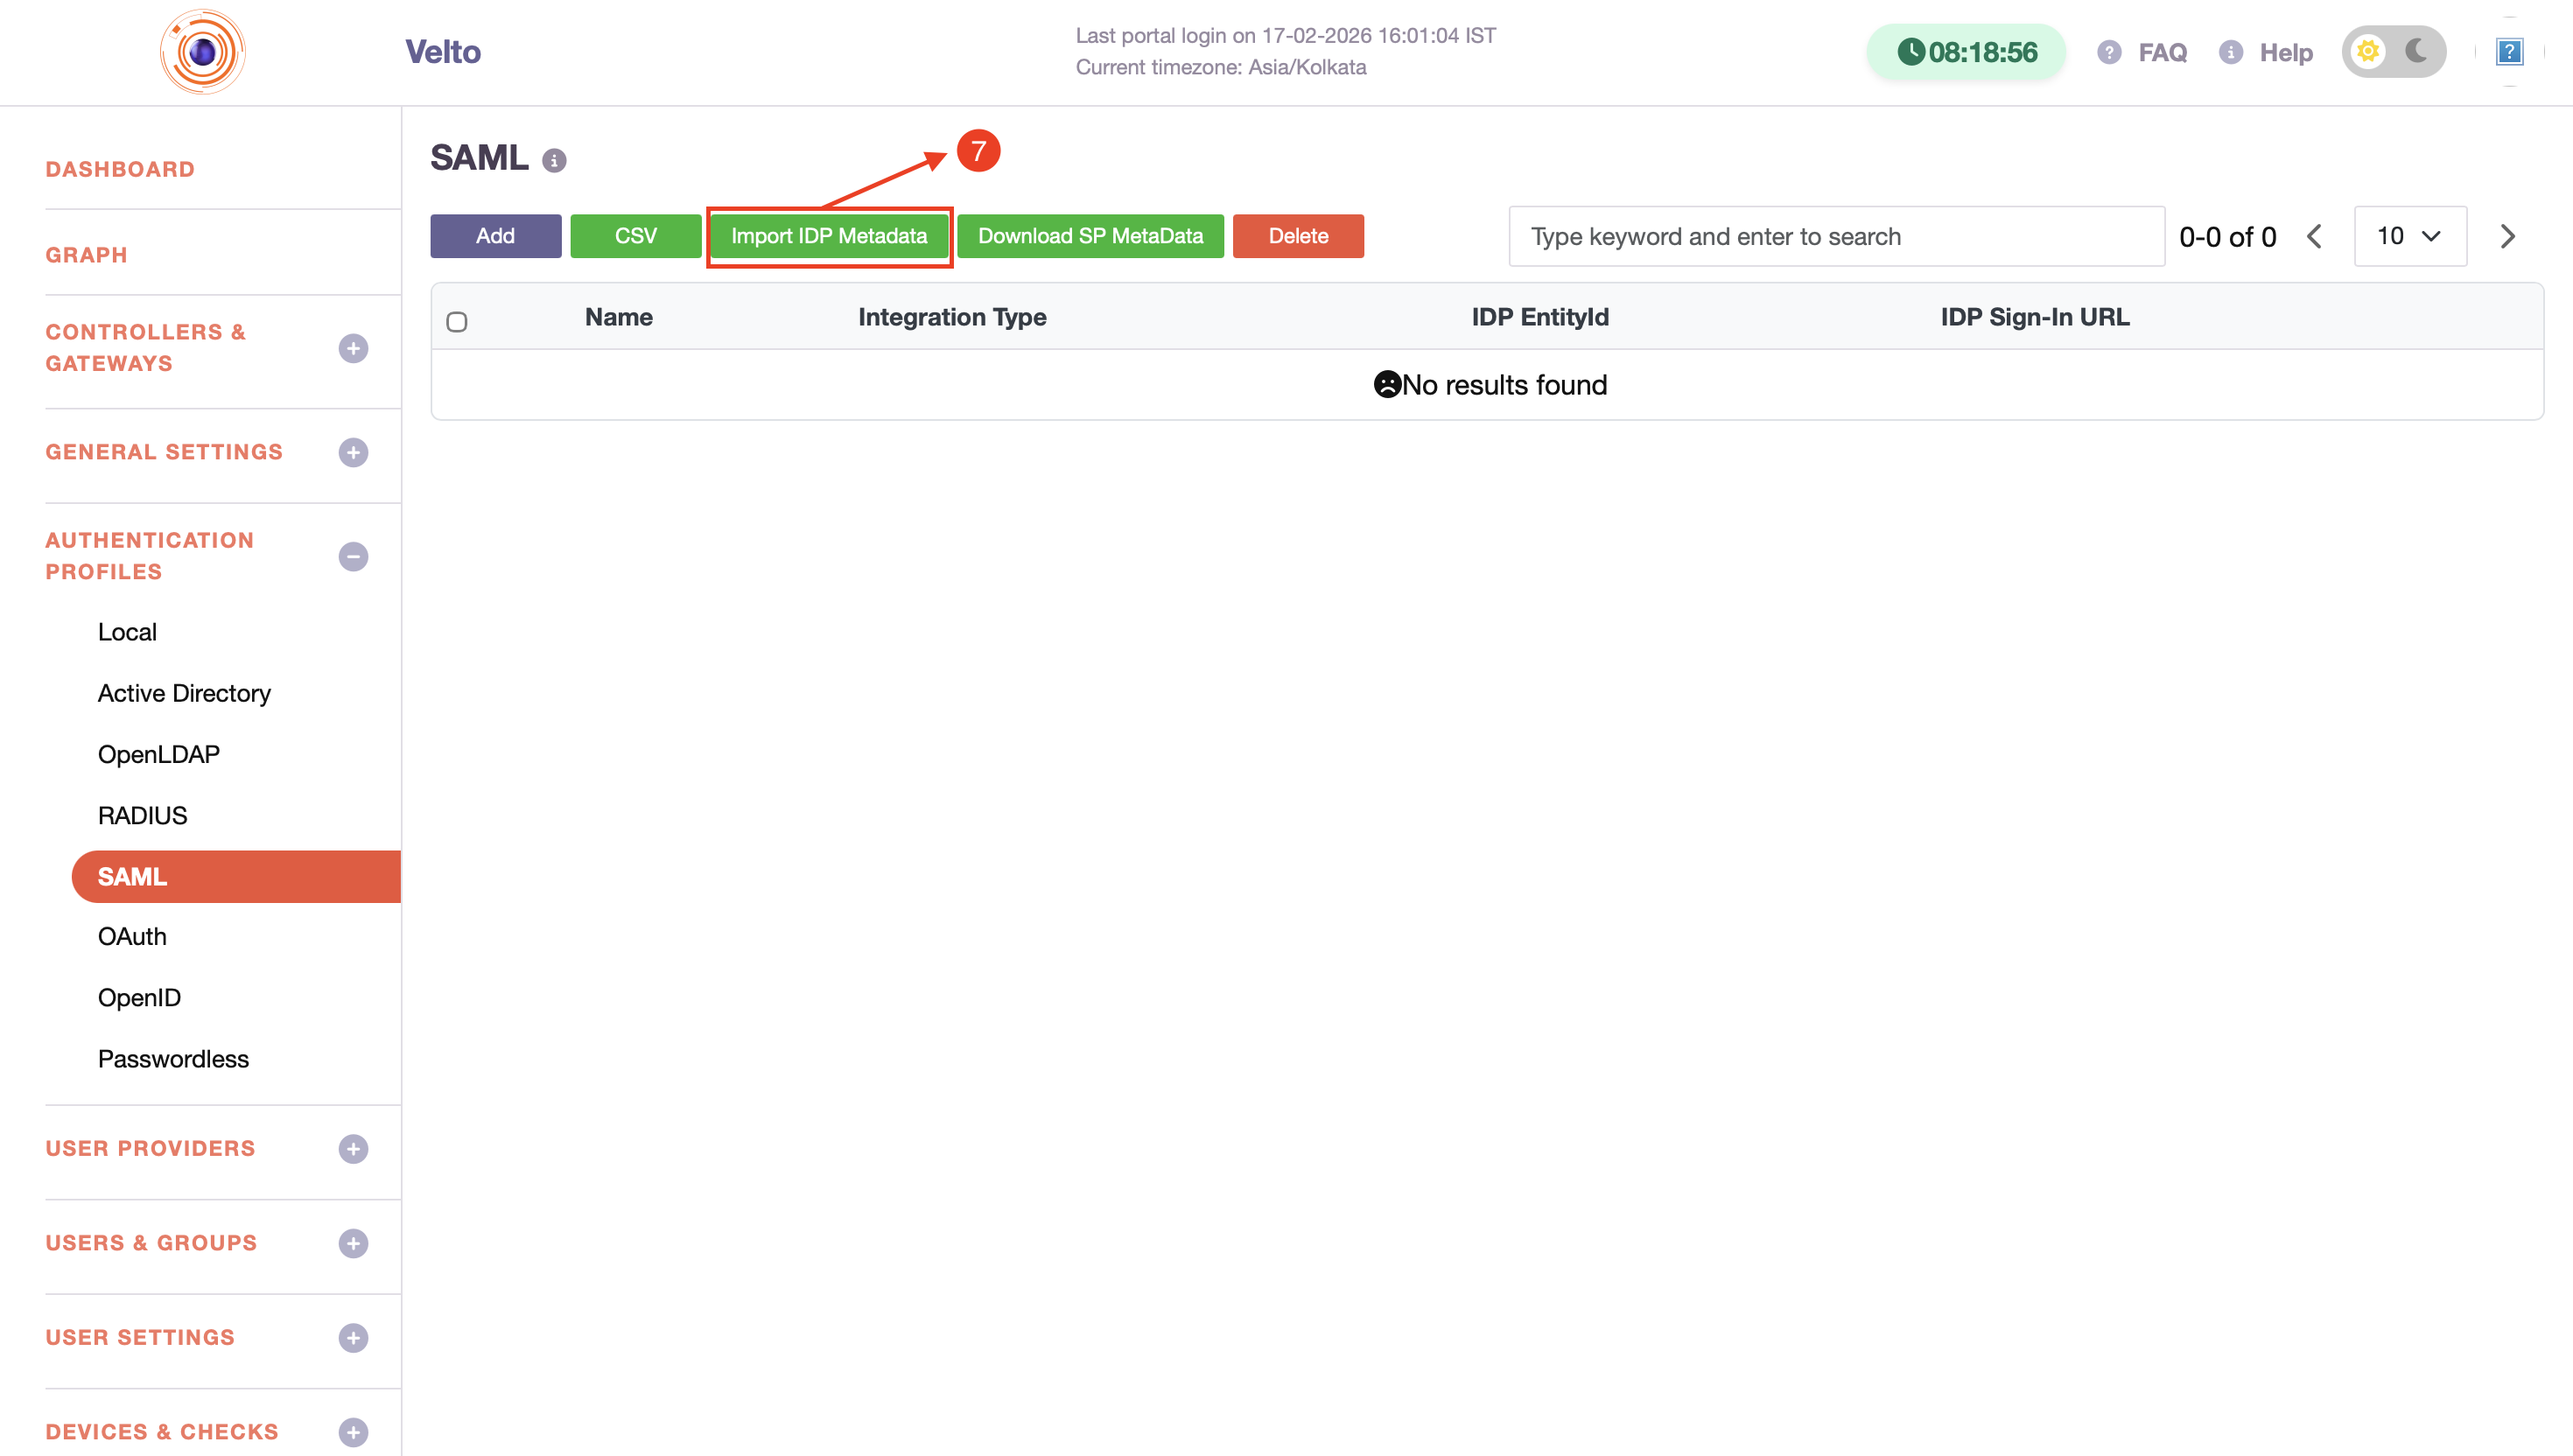
These parameters are necessary for establishing a secure SSO connection.
Step 8: Enable SCIM Provisioning in Okta
- Log in to the Okta Admin Console
- Navigate to Applications and select the created application
- Go to the General tab
-
Click Edit, enable SCIM Provisioning, and click Save

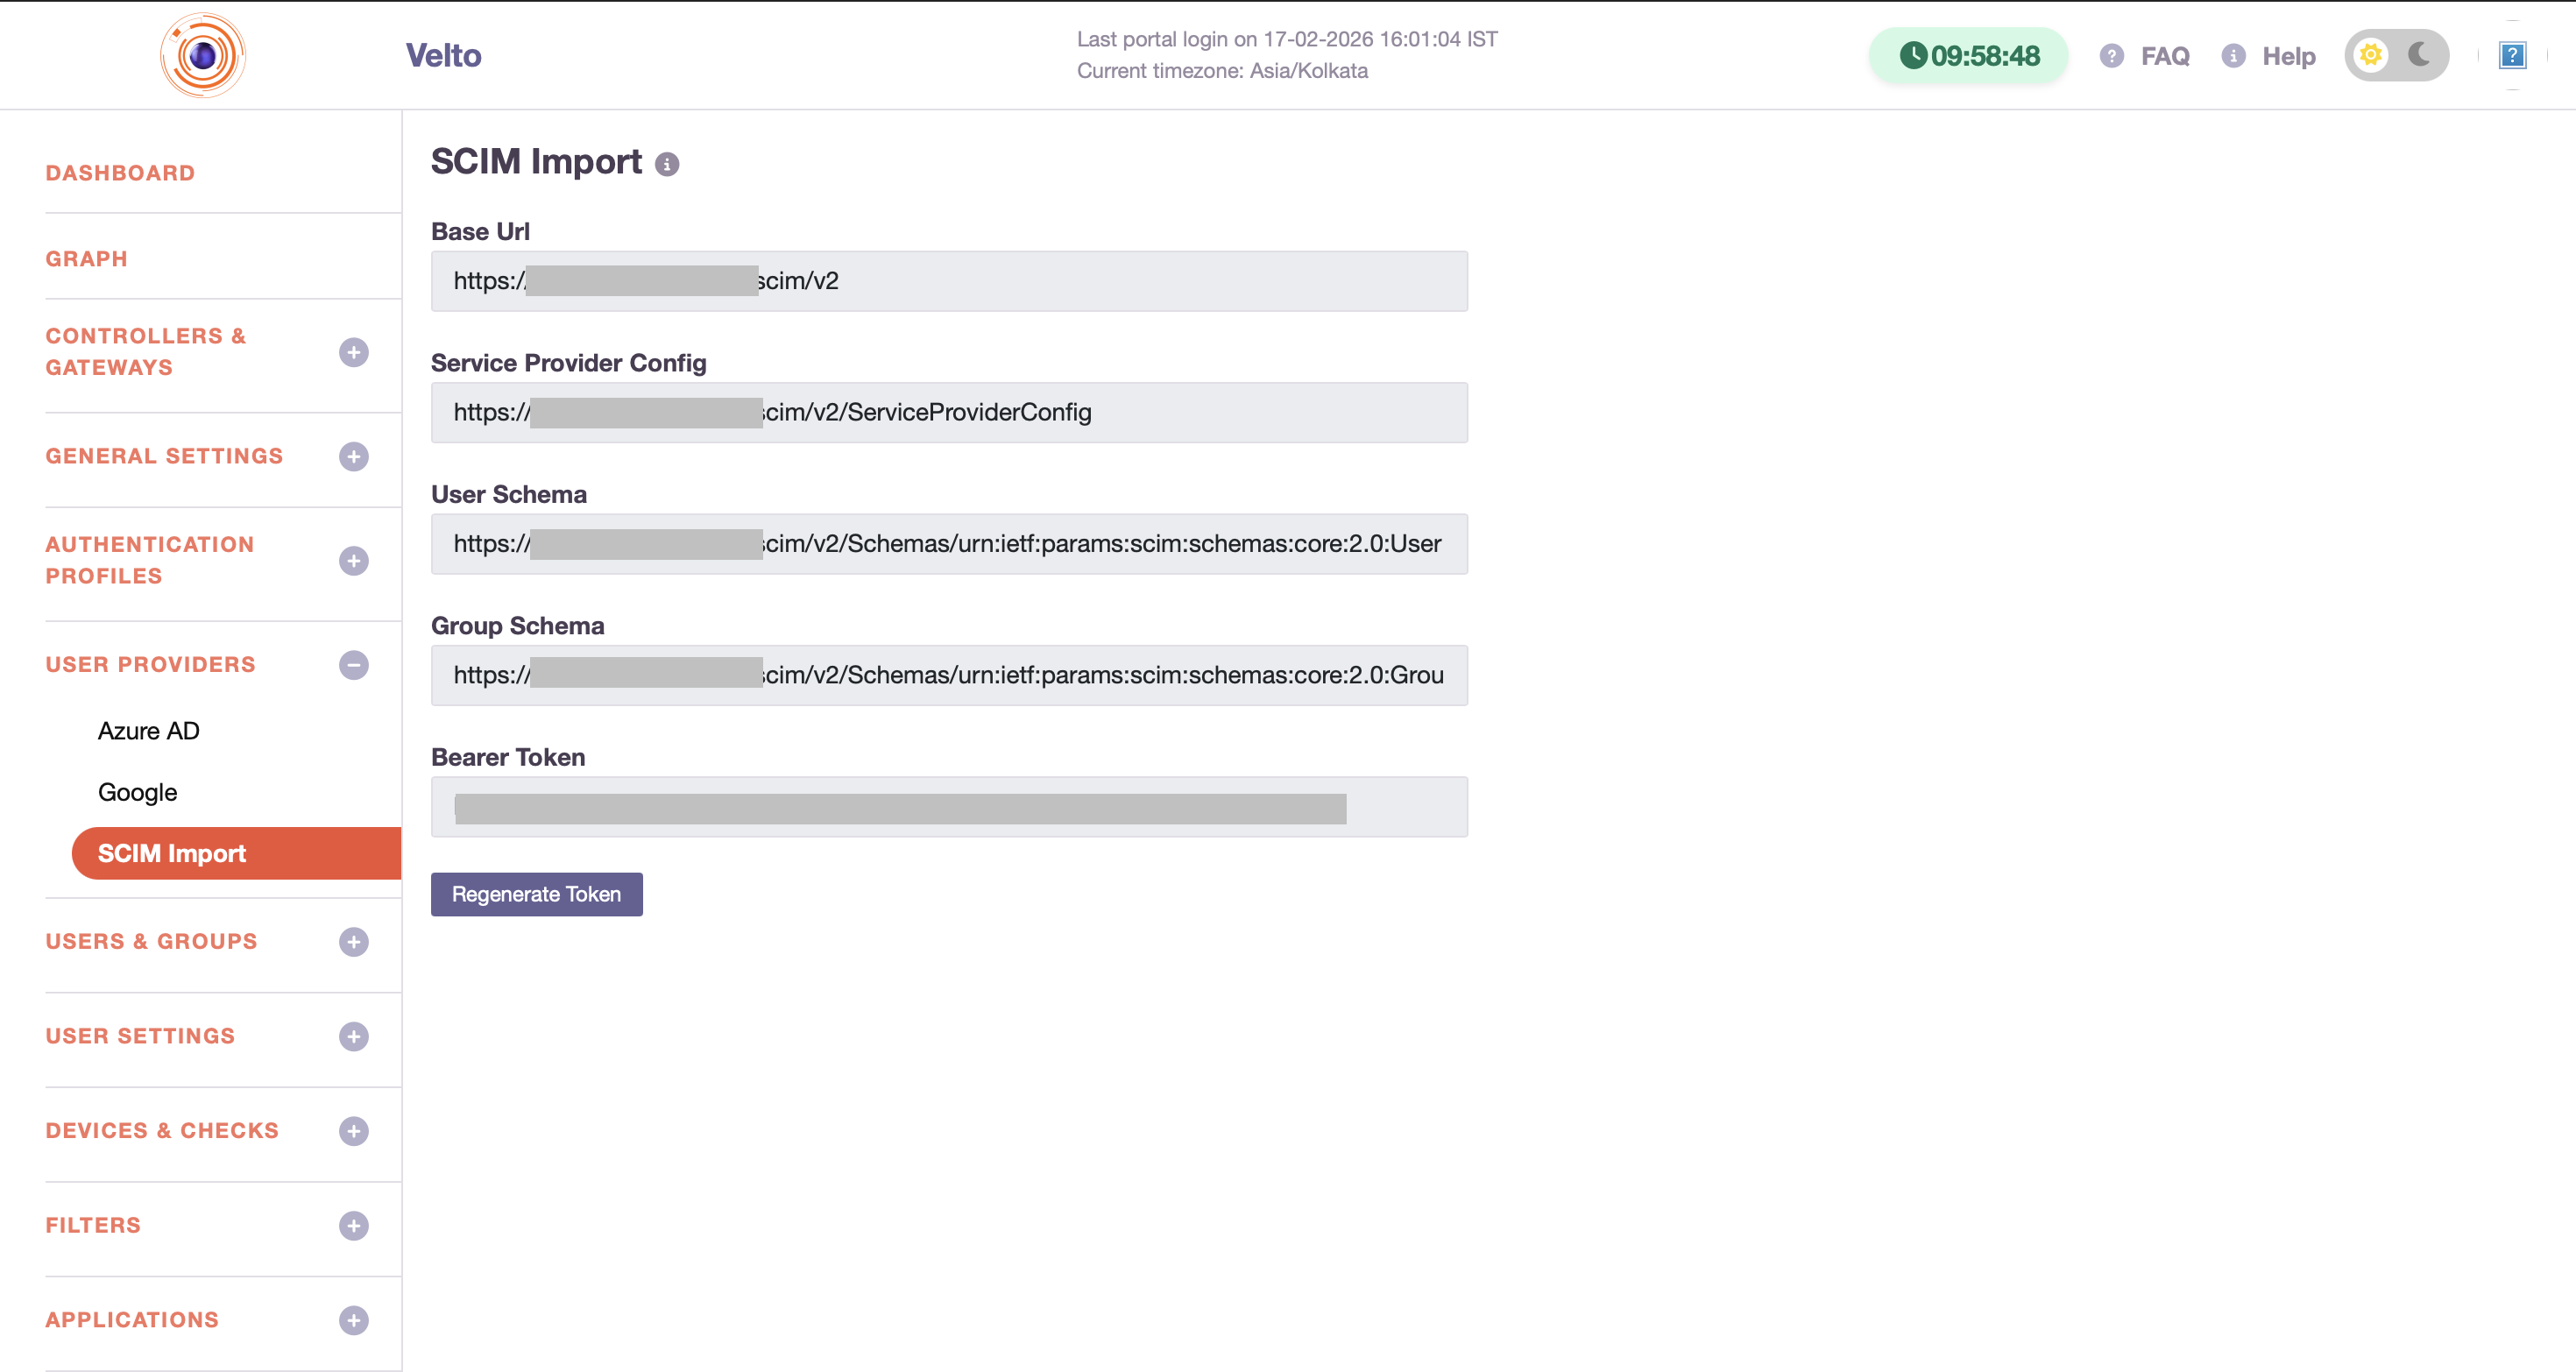
Step 9: Retrieve Base URL and API Token from InstaSafe
- Log in to the InstaSafe Admin Console
- Navigate to User Provider → SCIM Import
-
Copy the Base URL and API Token for SCIM provisioning configuration
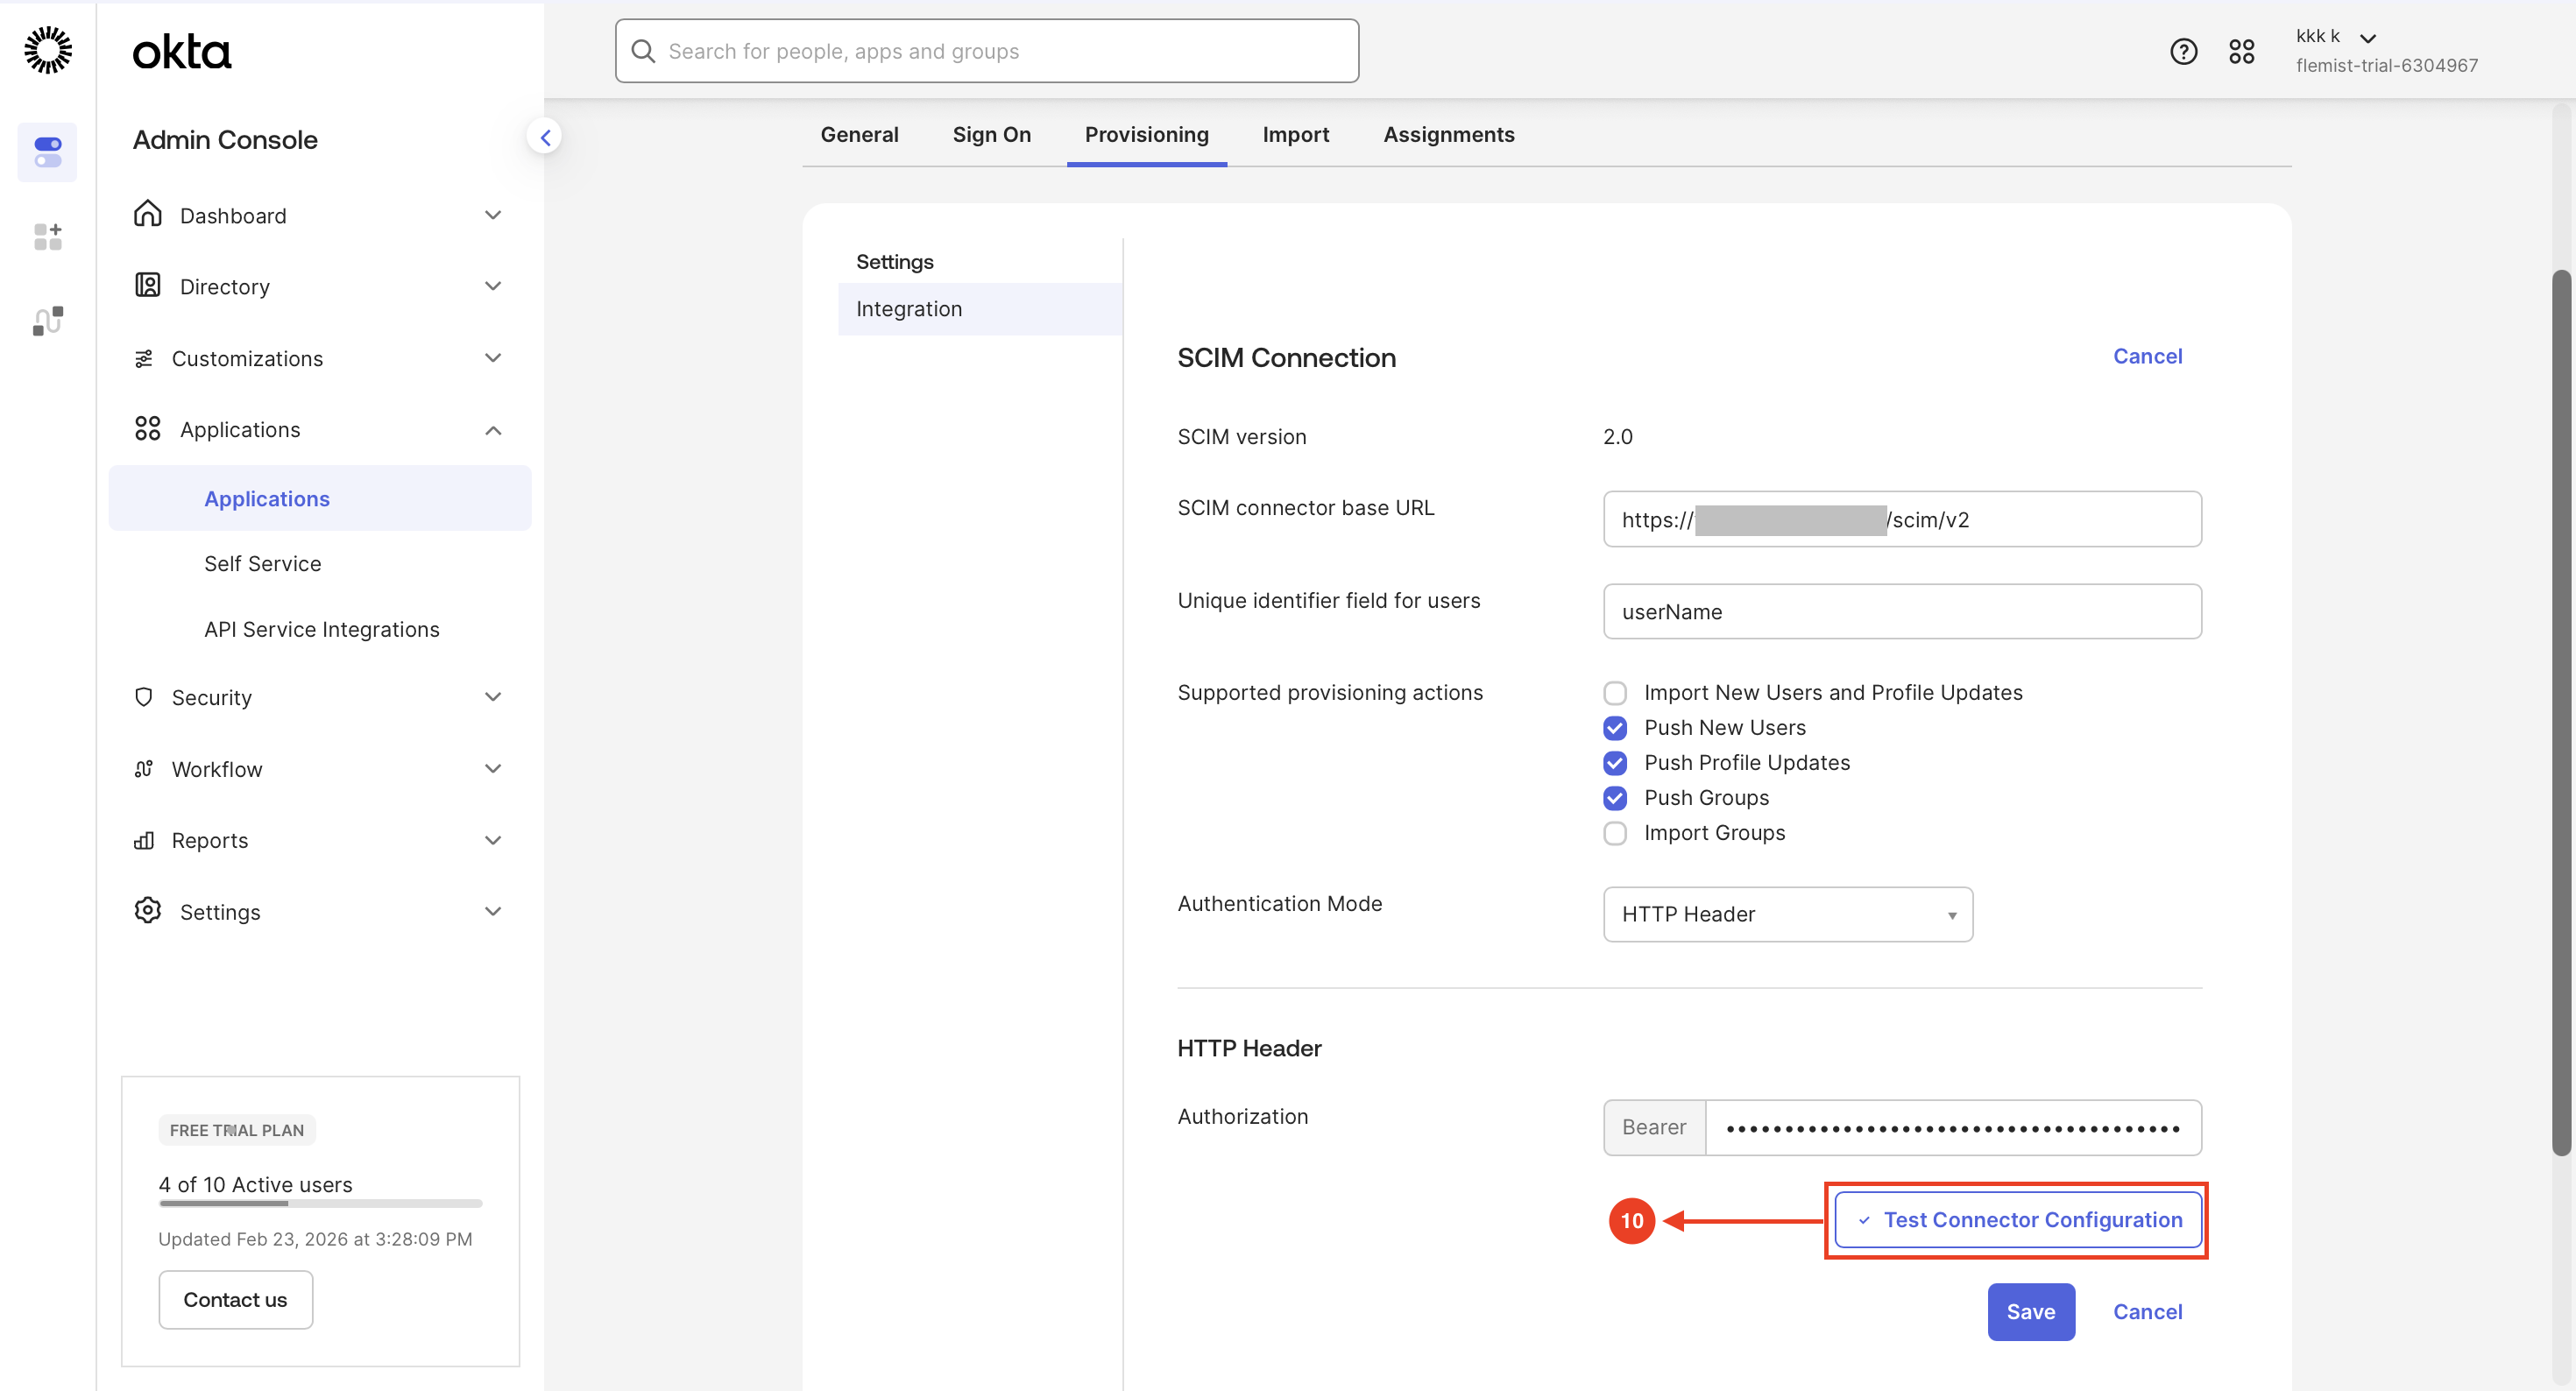
Step 10: Test SCIM Connector Configuration
- Click Provisioning and click Edit
- Paste the URL and Token (Click Regenerate Token to get the Token from ISA Console)
- Select HTTP Header in Authentication Mode
-
Click Test Connector Configuration to validate the SCIM connection settings
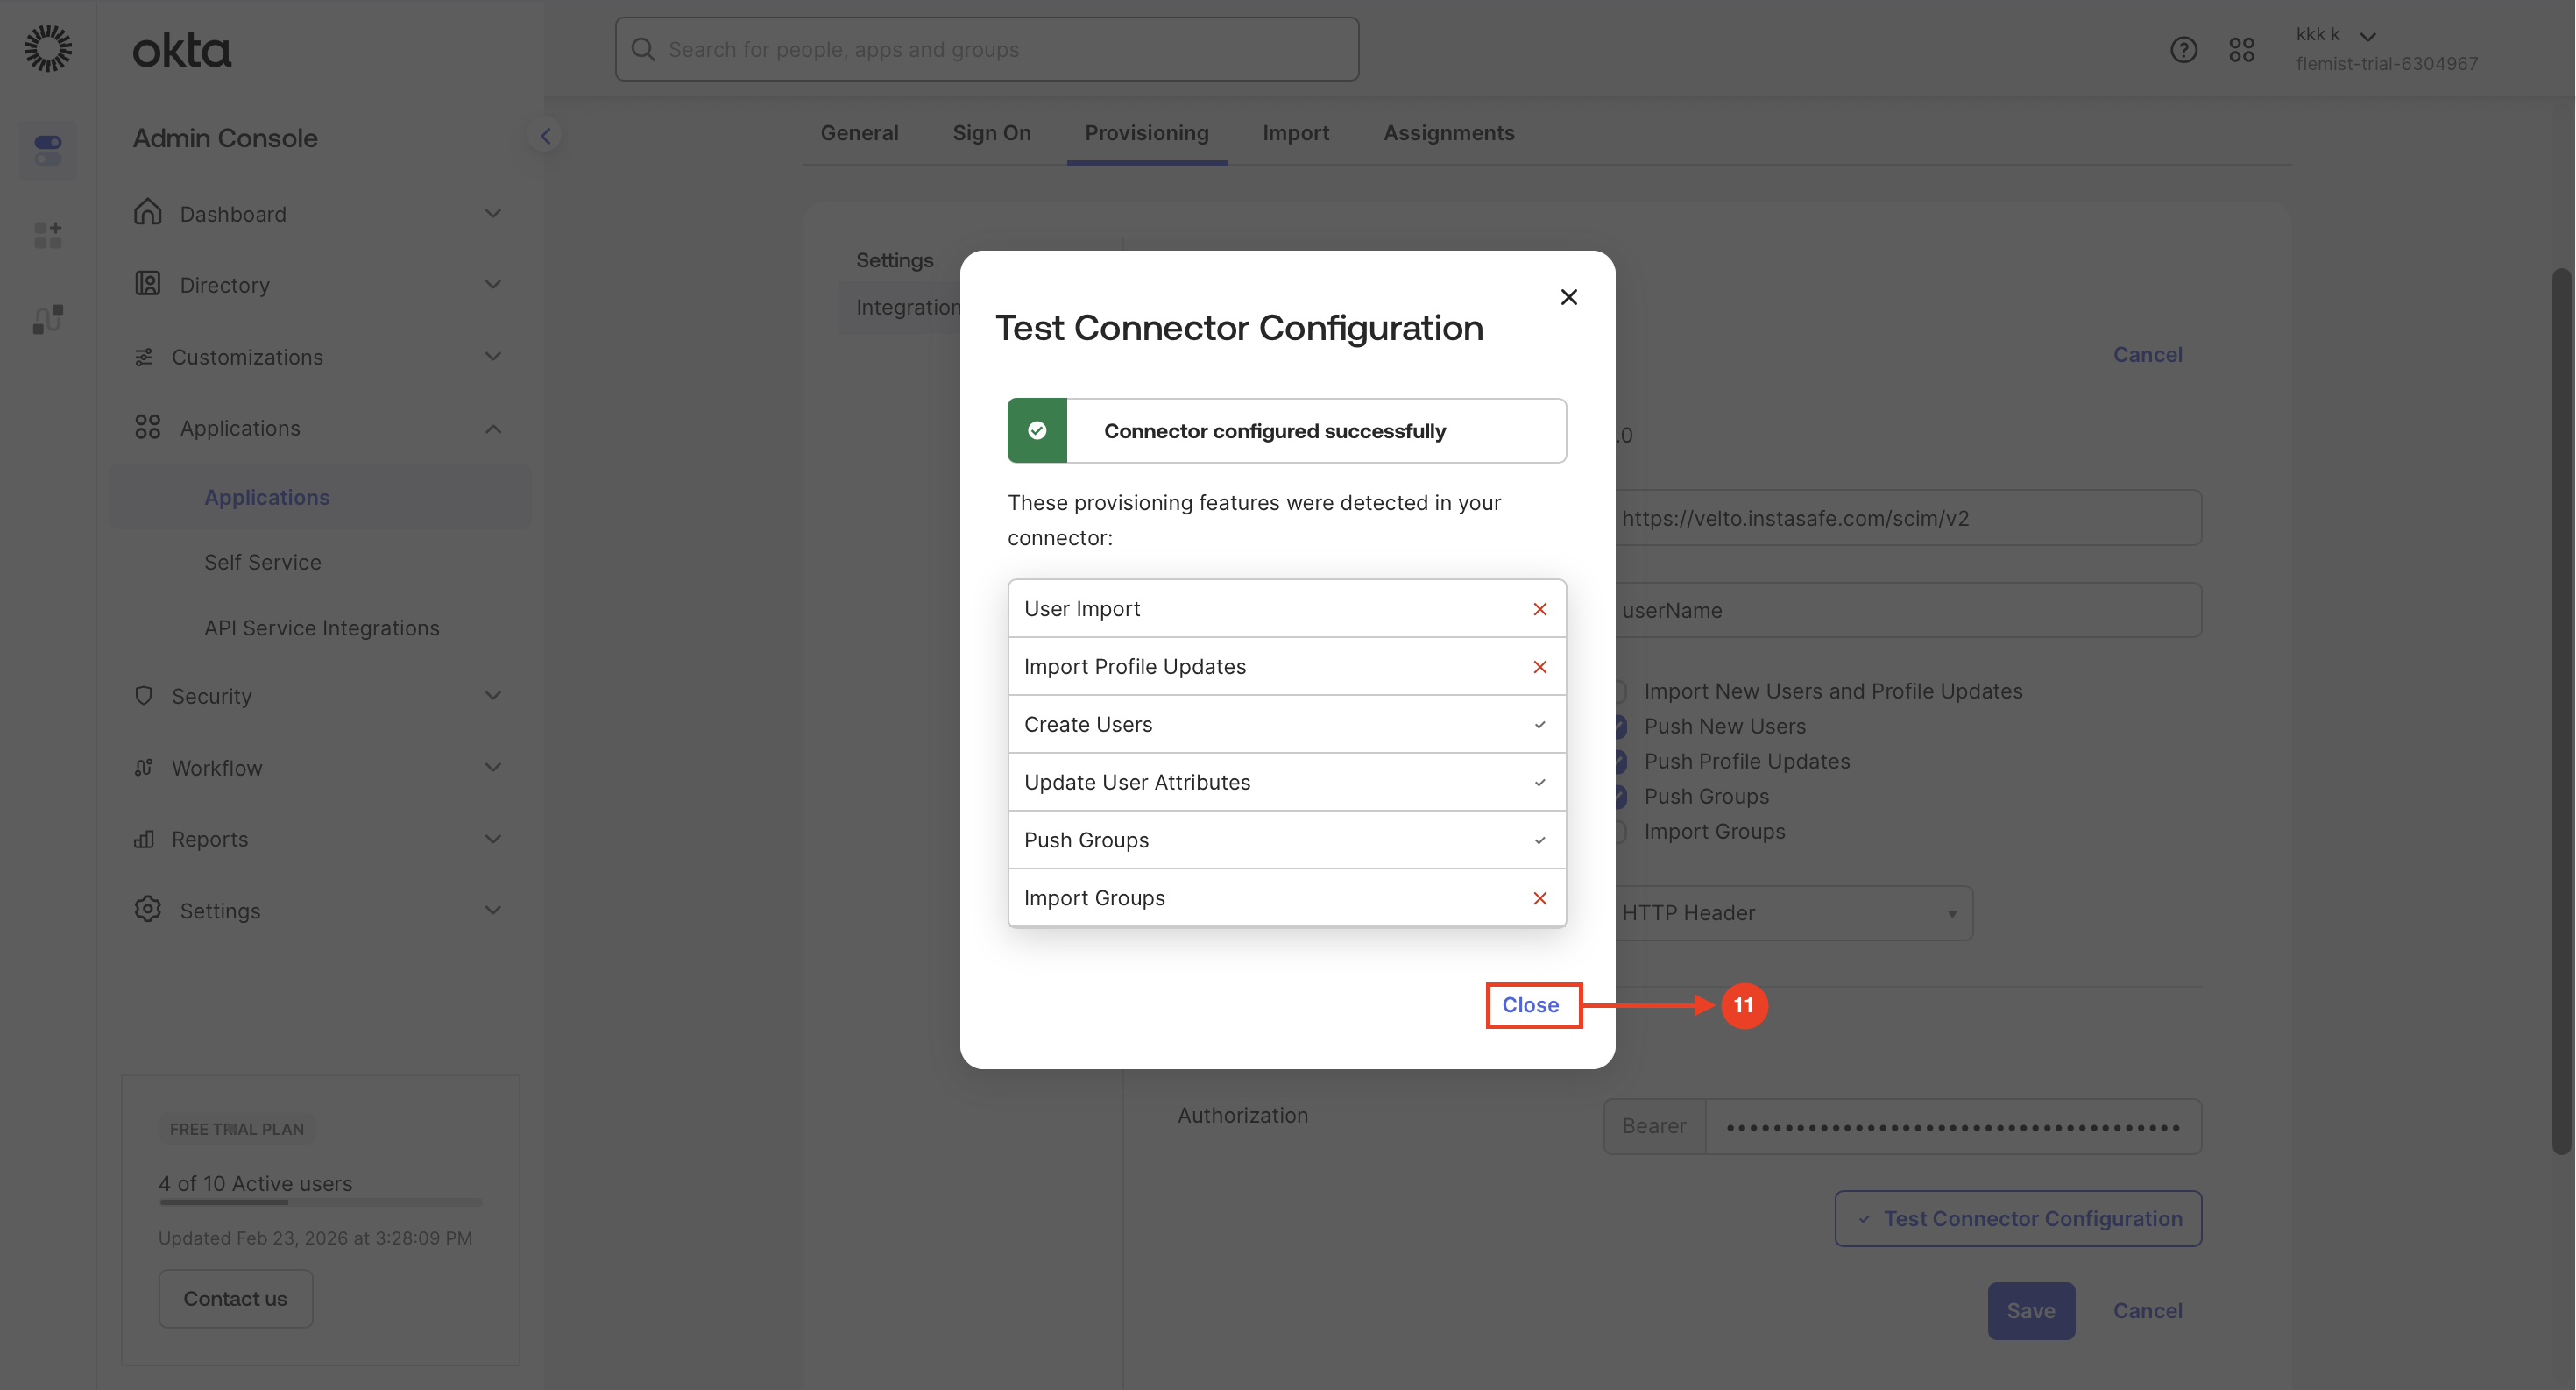
Step 11: Close Test Confirmation Window
-
Click Close after confirming the connector is successfully configured.
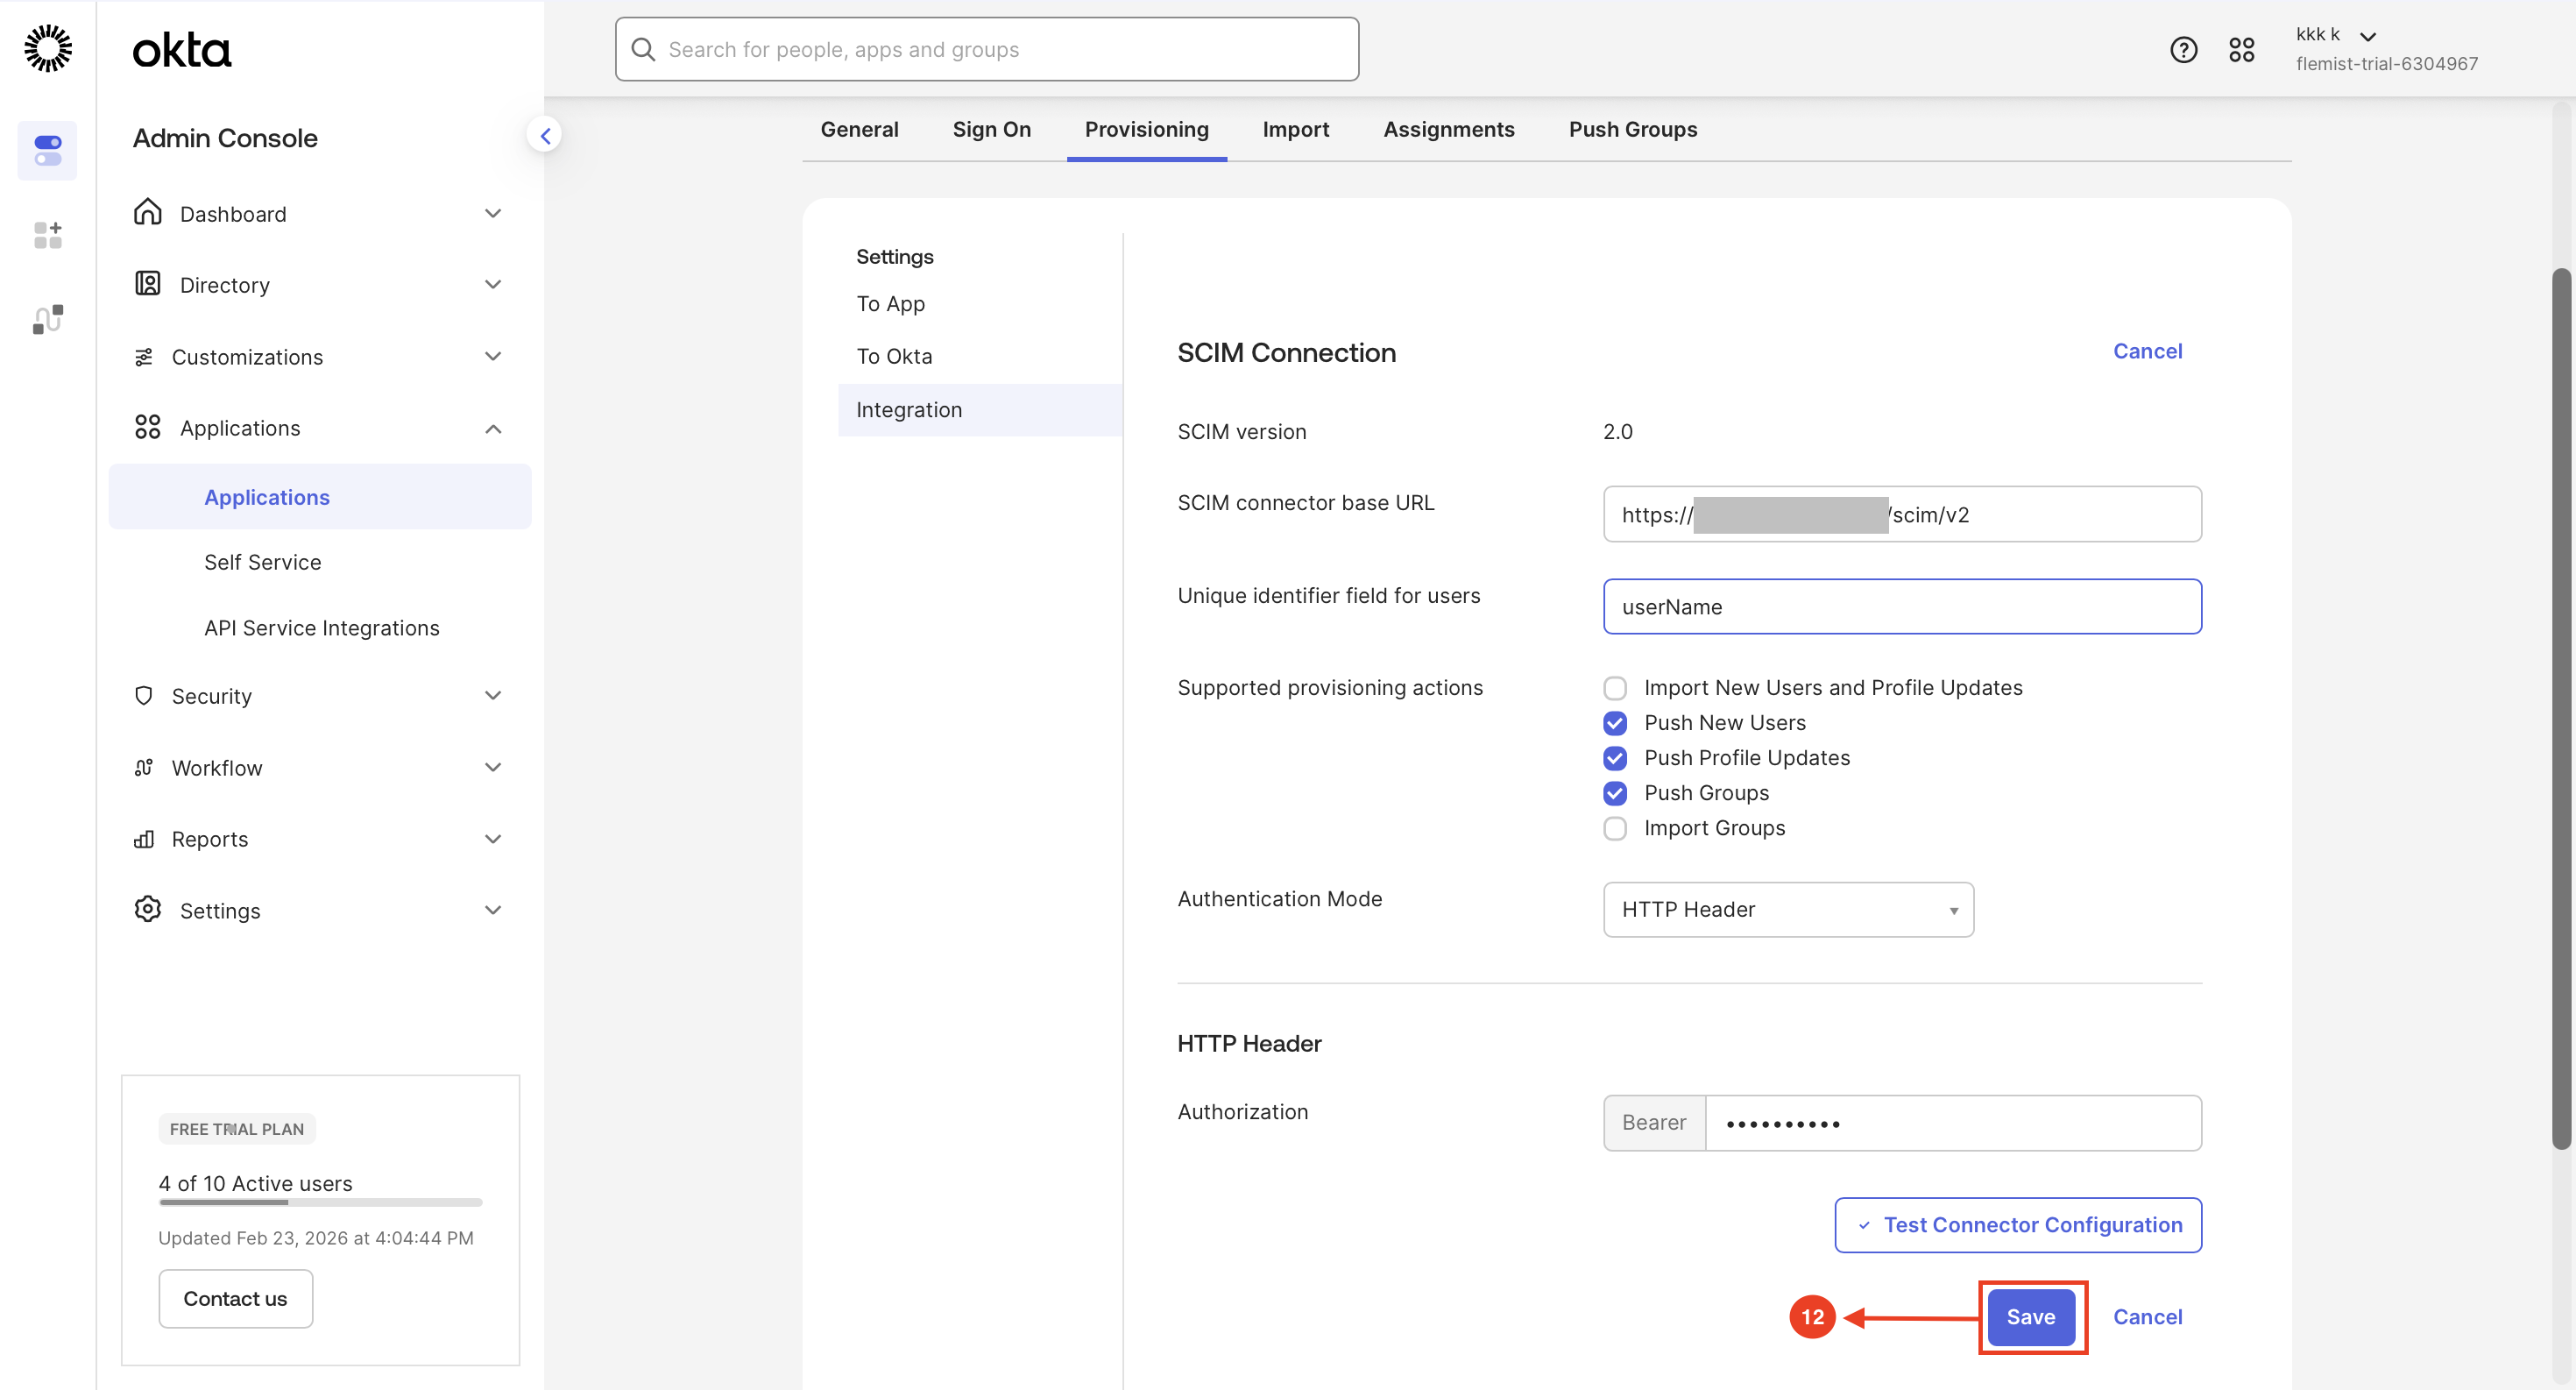
Step 12: Save SCIM Integration Settings
-
Click Save to apply and finalize the SCIM provisioning configuration.
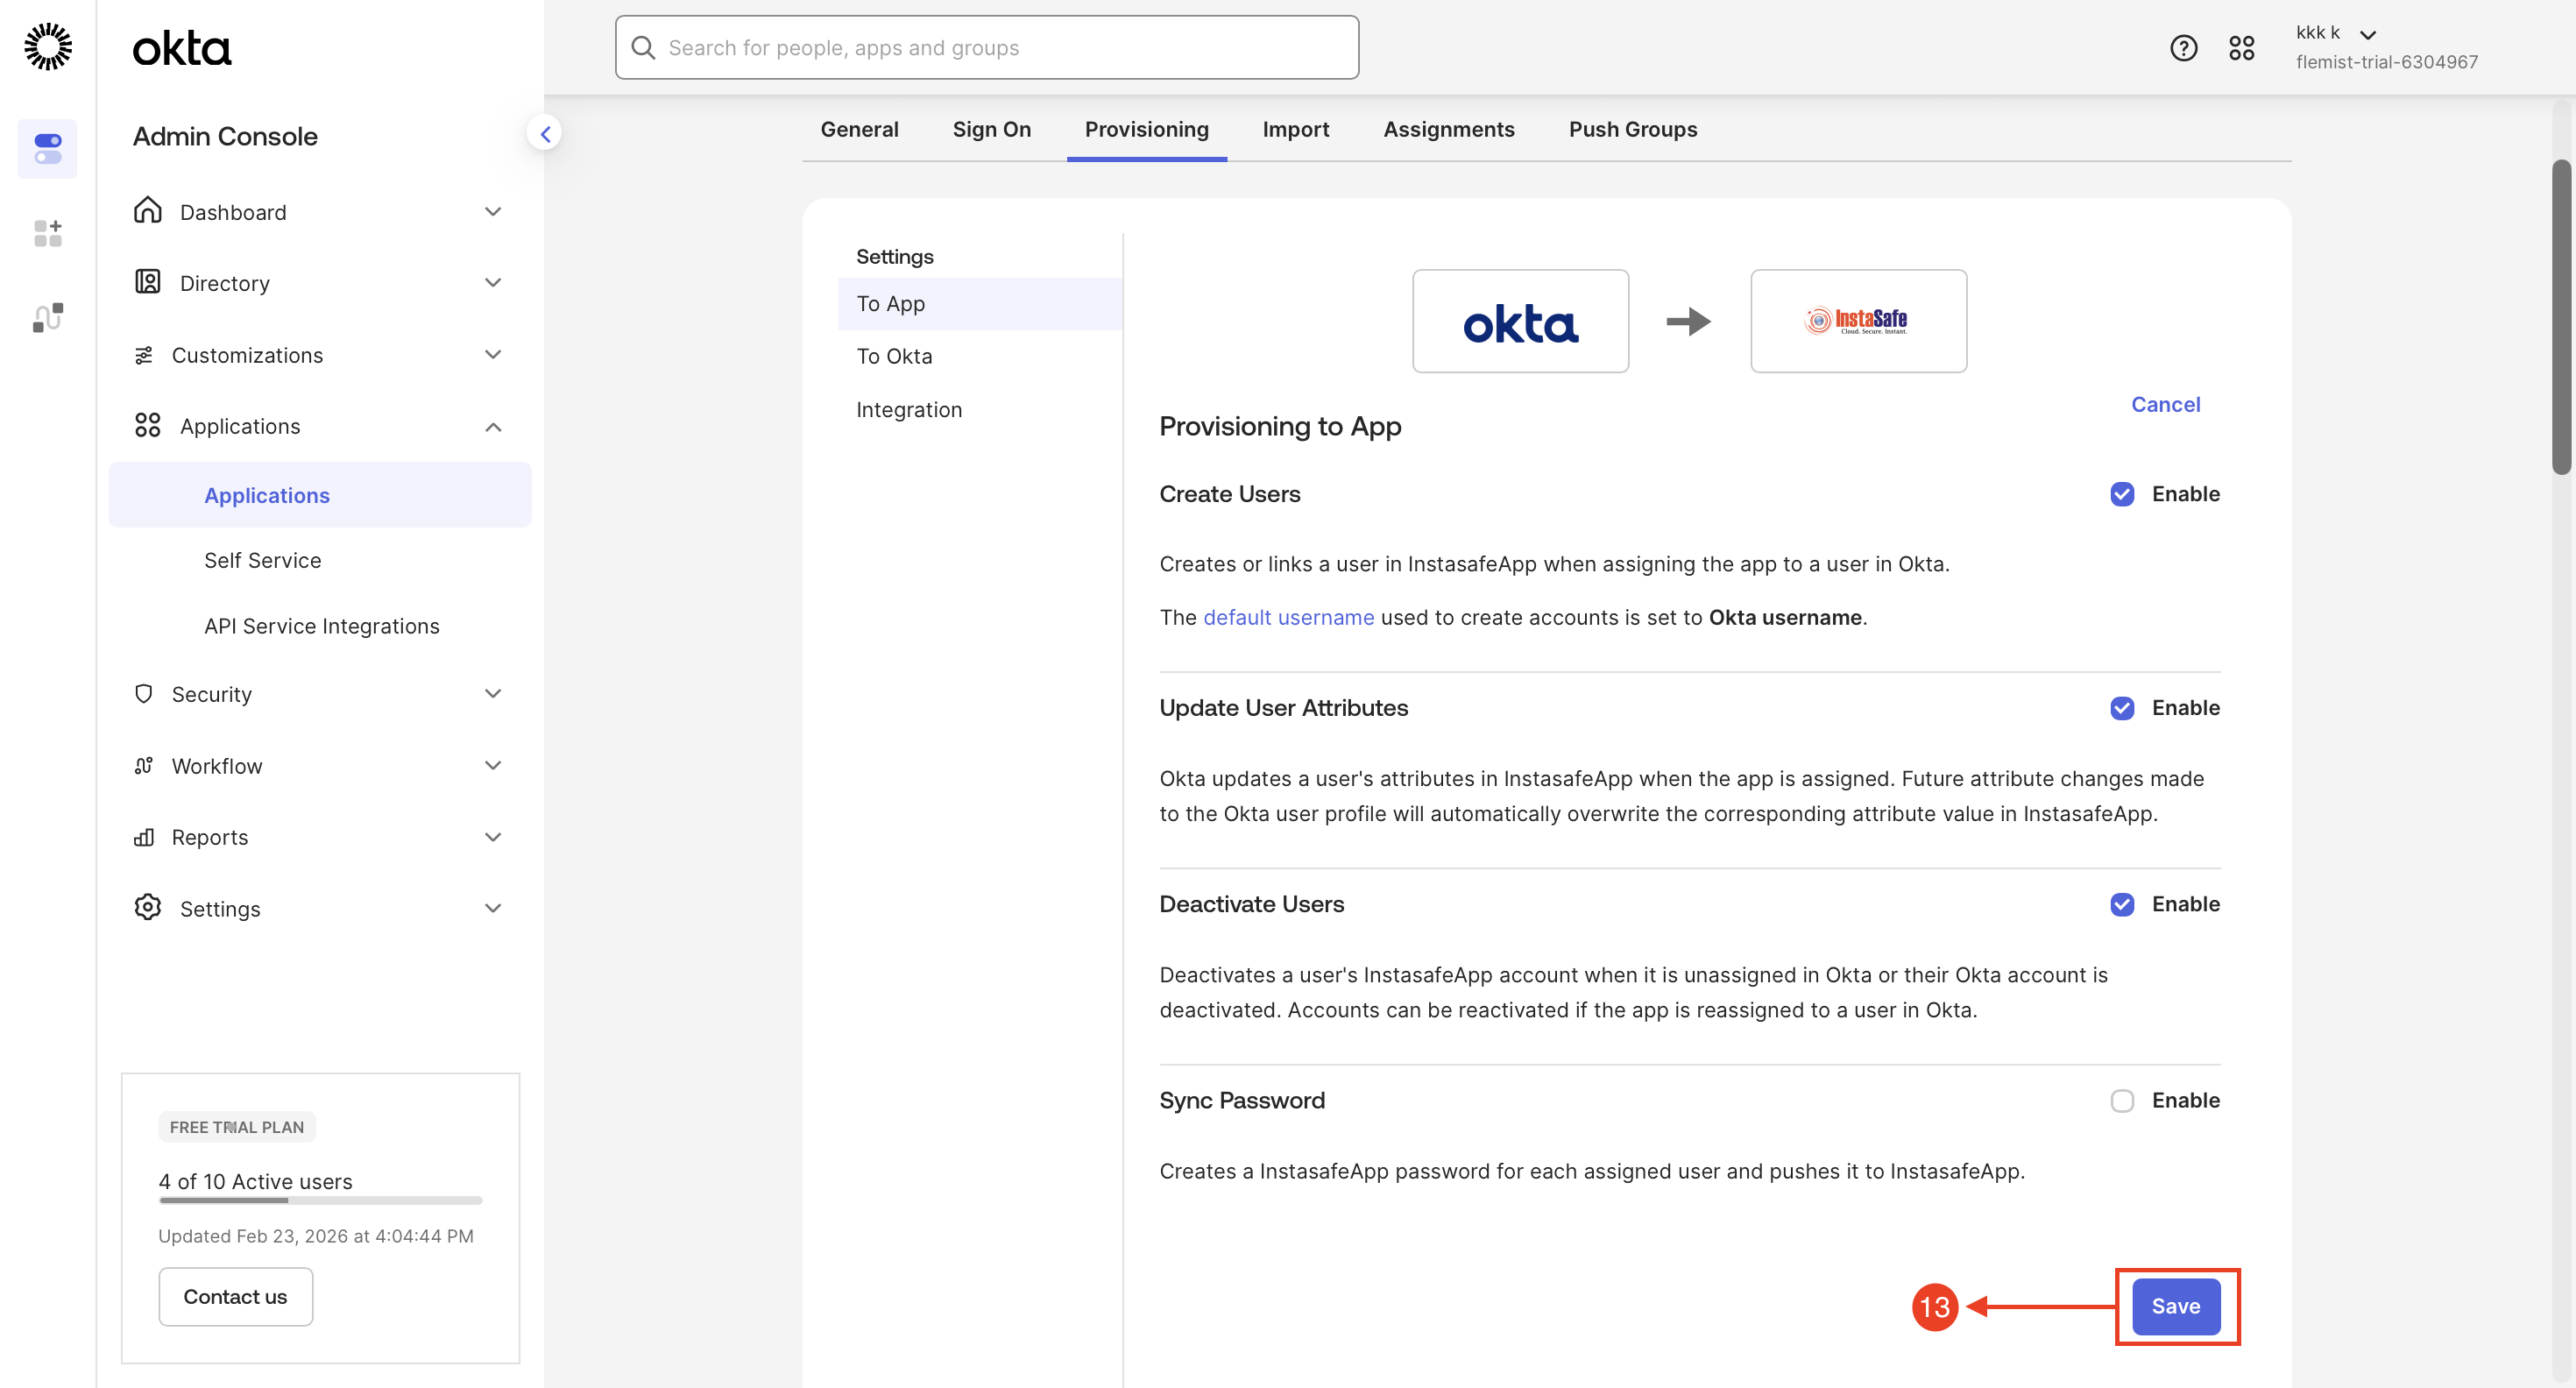
Step 13: Configure Provisioning Settings
- Navigate to Provisioning → To App, click Edit, enable the required provisioning options as per the configuration
-
Click Save to apply the changes
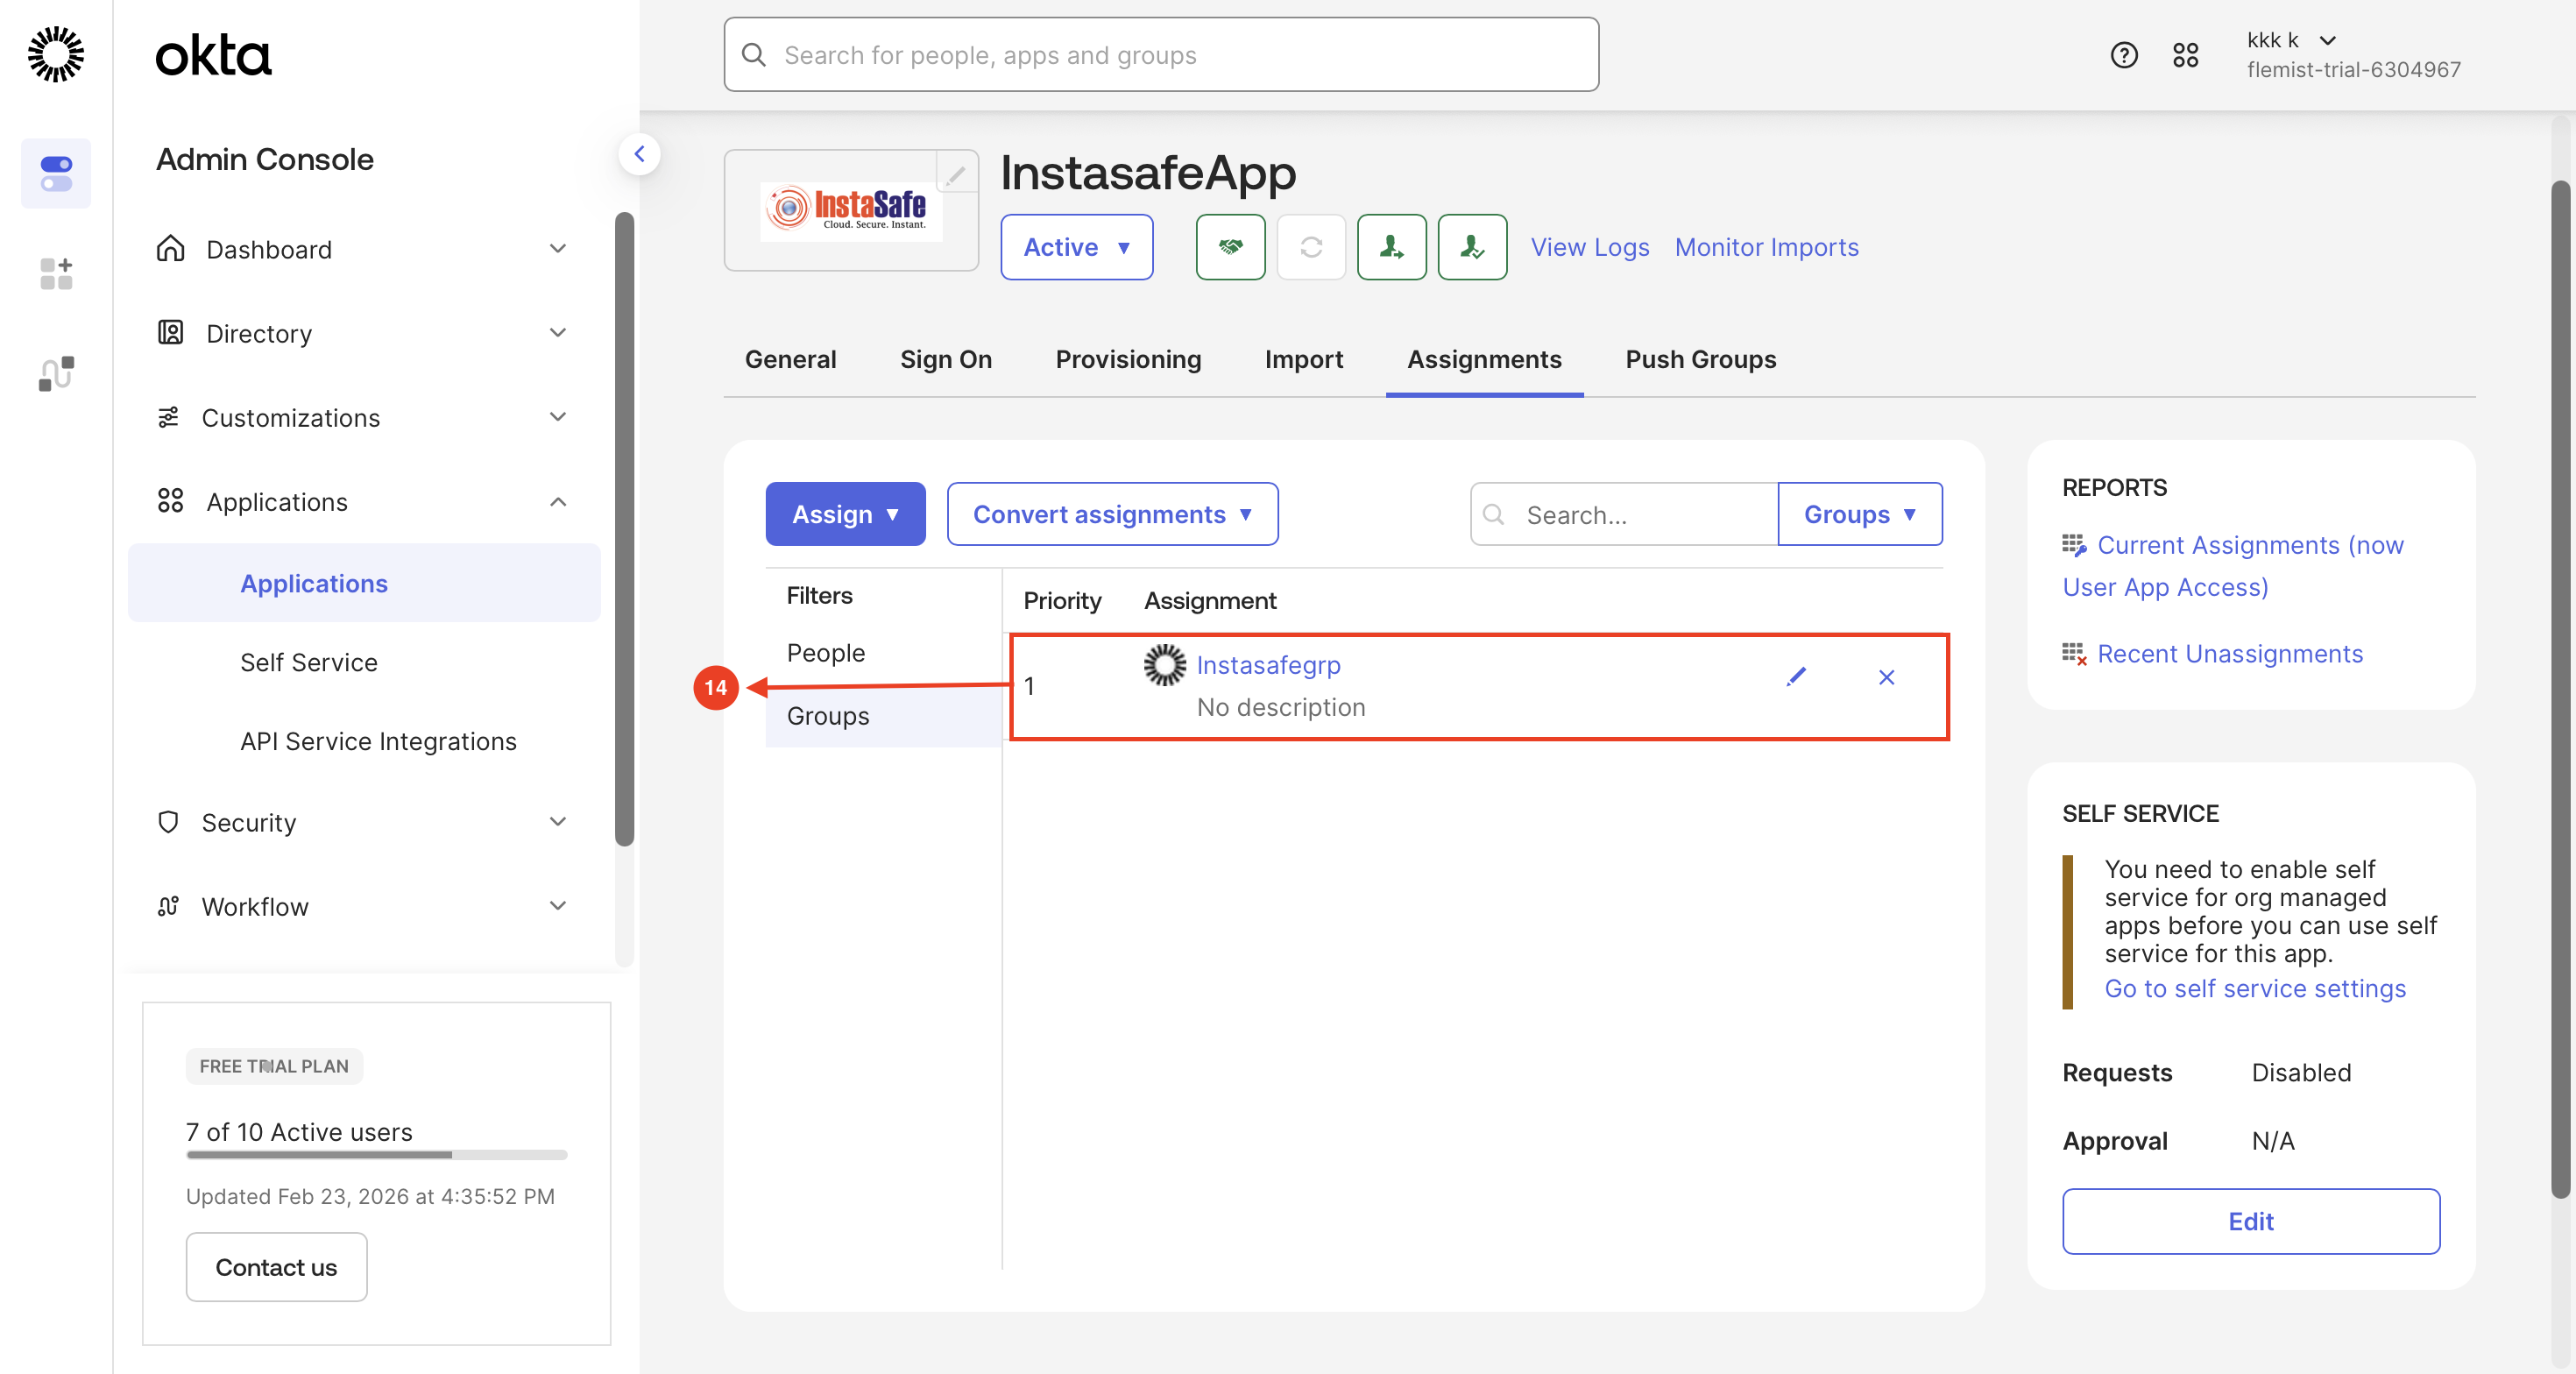
Step 14: Assign Okta Group to Application
- Navigate to Applications → Assignments, select Assign to Groups, and add the required group
-
Confirm the group is successfully listed under Assignments without errors
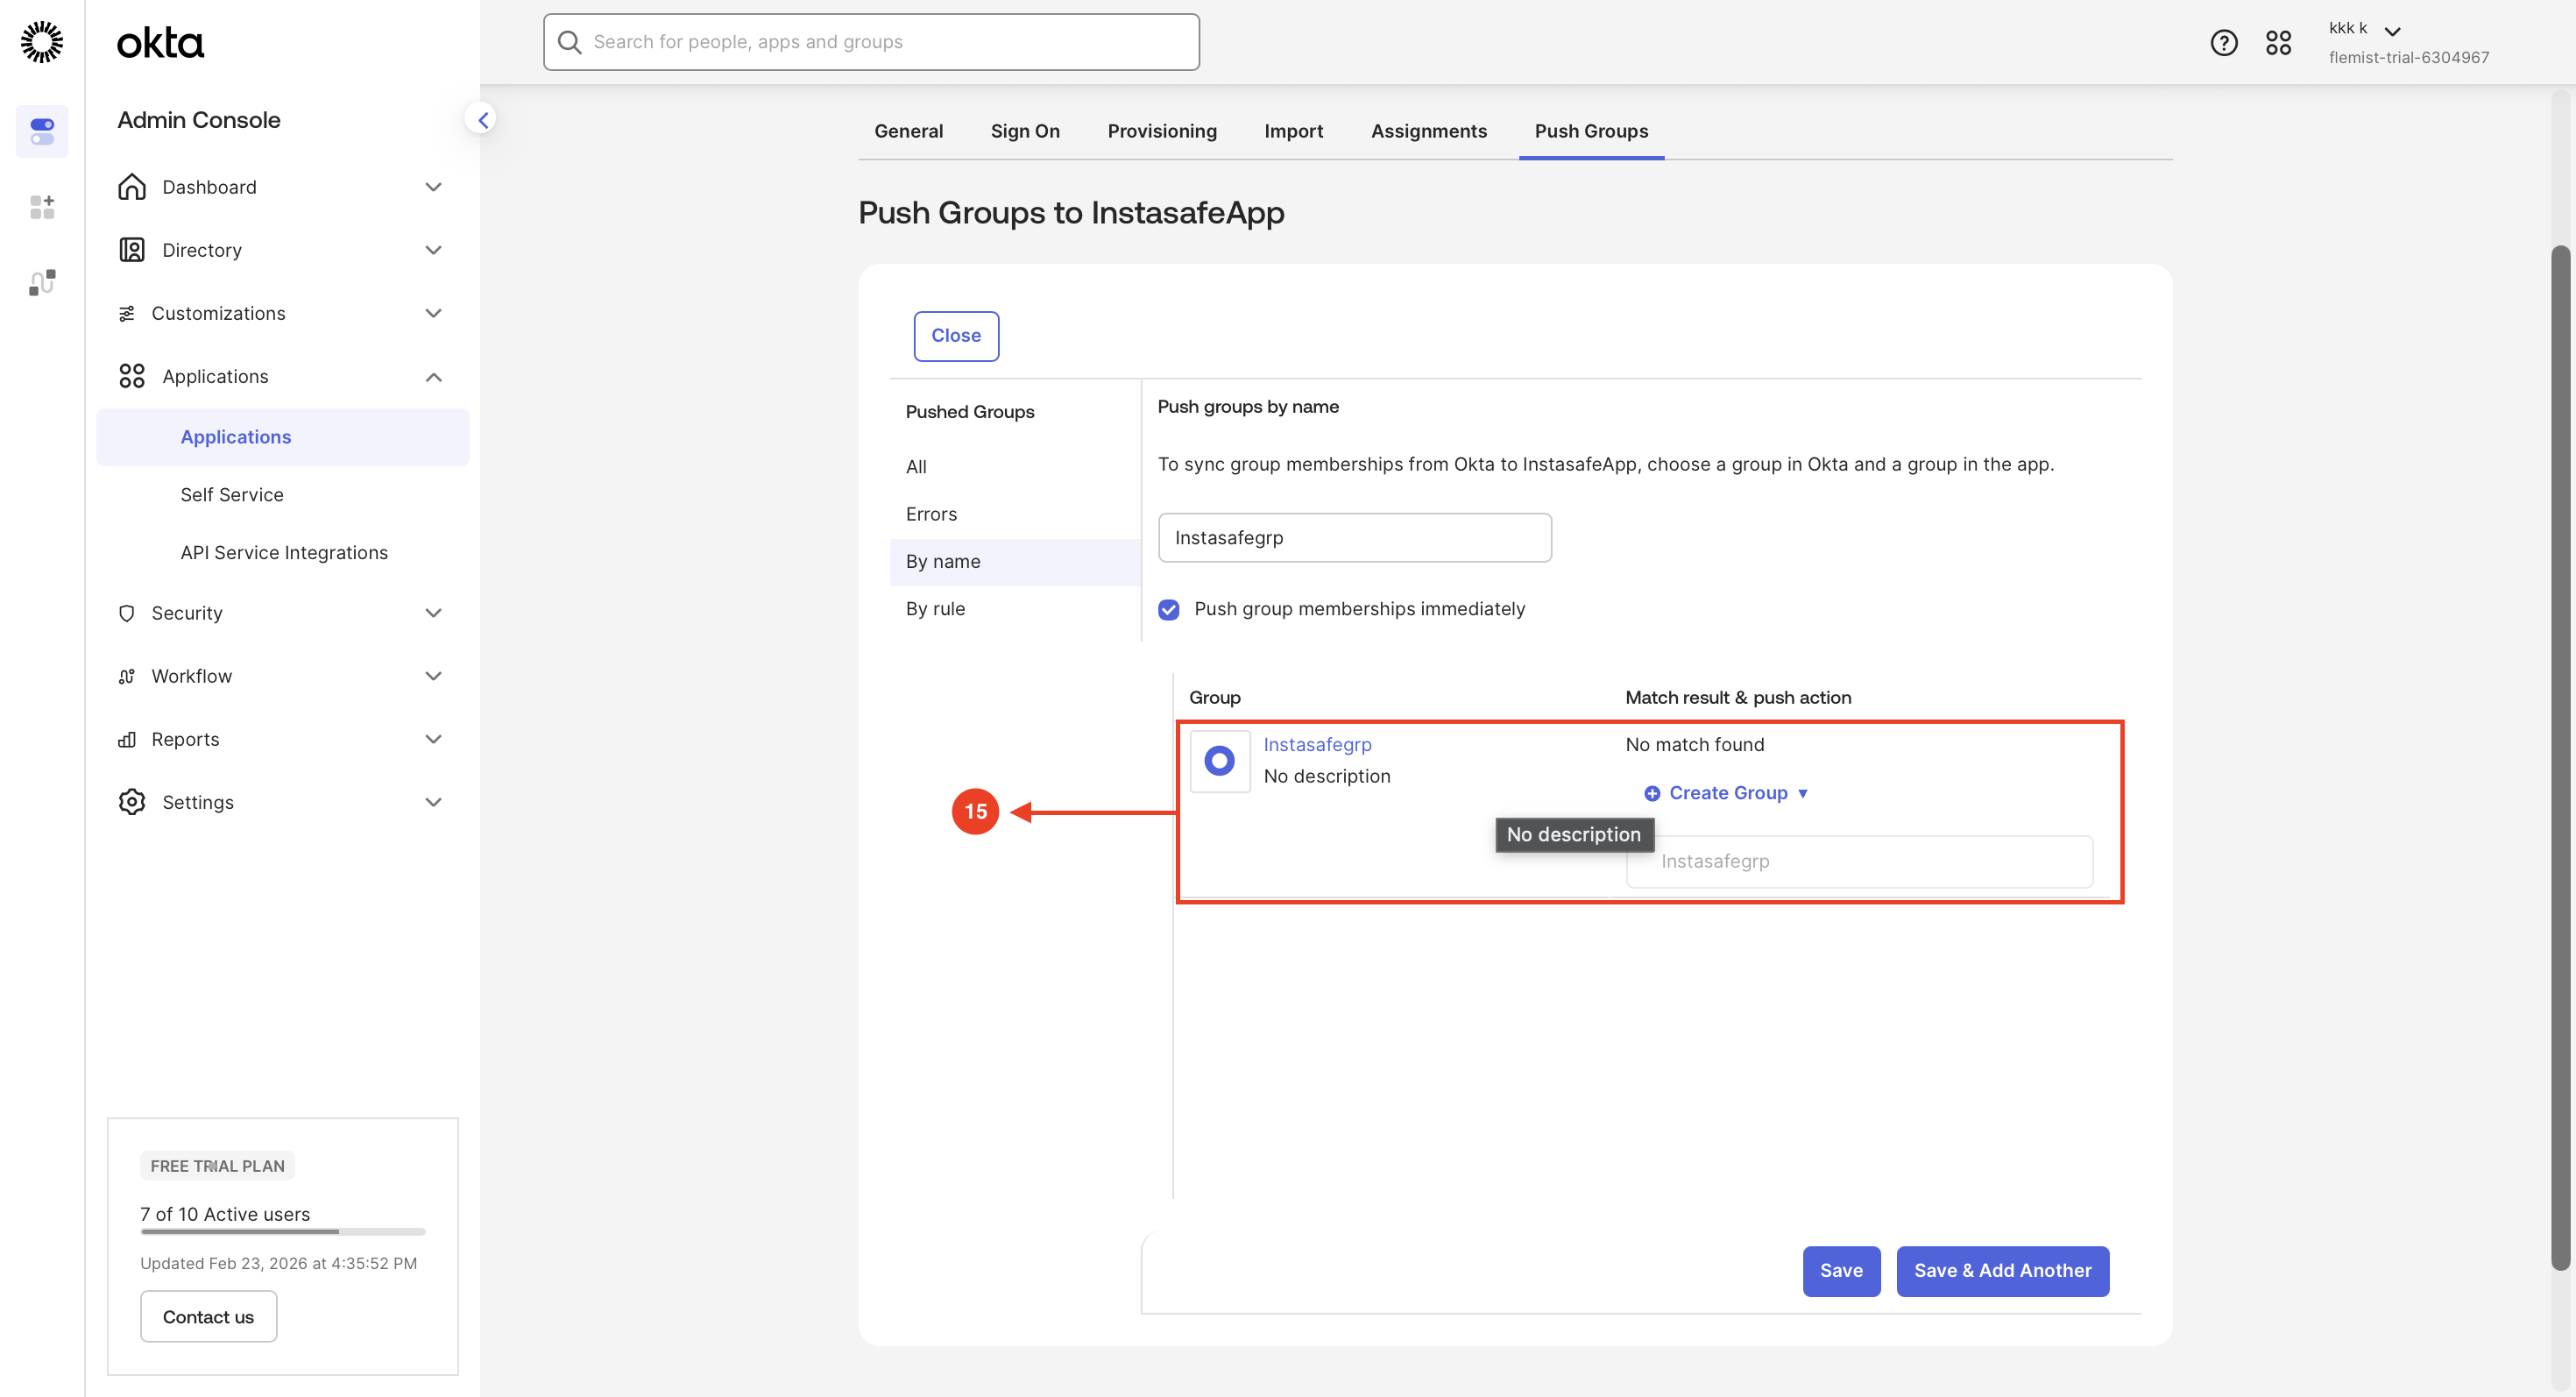
Step 15: Configure Push Group
- Go to the Push Groups tab, select the group using By name
-
Save the configuration and verify successful group synchronization status
Step 16: User and Group Provisioning Status Verification
- Access the InstaSafe Admin Console
- Navigate to the Events / Logs section
-
Review Provisioning Events

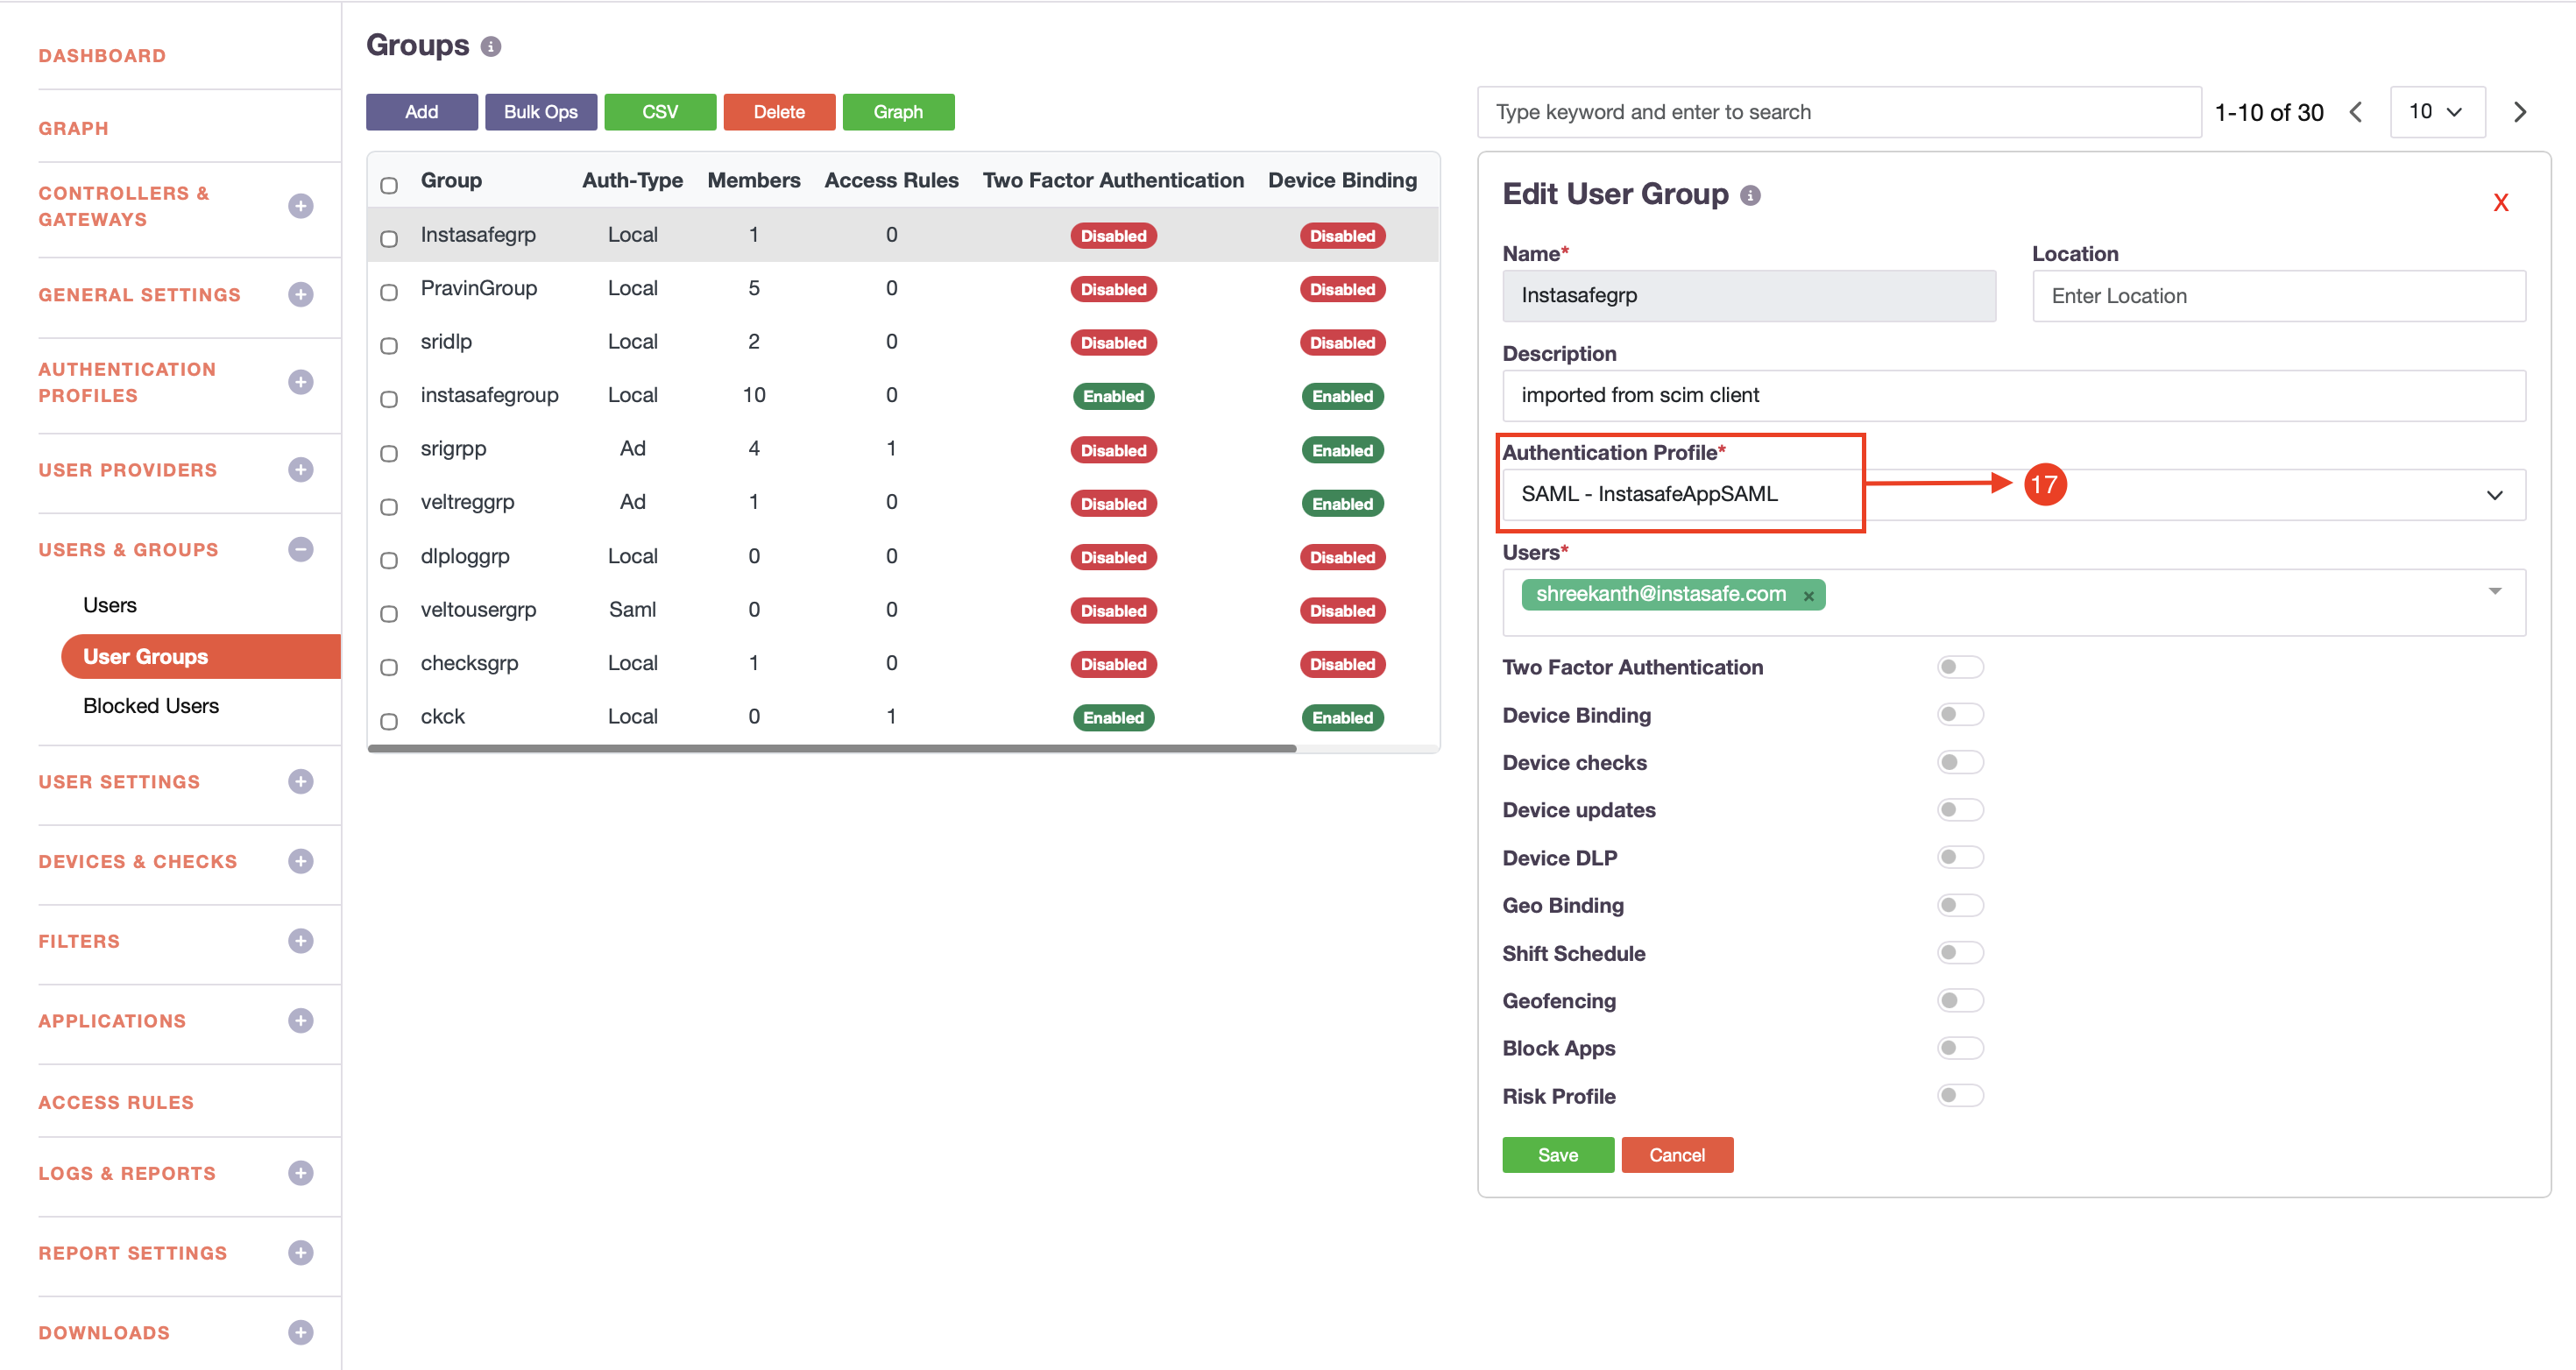
Step 17: Assign Authentication Profile to User Group
- Access the InstaSafe Admin Console
- Navigate to Users & Groups → User Groups
- Select the required group and assign the configured Okta SAML Authentication Profile
-
Click Save